Veneer selection for Cabinet face, bottom face of Ikebana panel, top face of top drawer panel and back doors

Selecting the veneer for the rest of the other parts. The book matching for the top face of the top drawer box panel, the bottom face of the Ikebana base and both faces for the cabinet base had to be the same as the top carcass panel.
The diagonal seam joint for the top drawer box panel and ikebana base are just a little bit shorter than the top carcass panel. I used one of the already cut book matched sections from the top carcass panel as a template to trace onto the new veneer section and just dropped the diagonal line down to the correct length.

As for the cabinet base the diagonal line is longer so again just used the previous book matched section and increased the length of the line.

These were some of the offcut sections from the veneer leafs. The book matched sections I wanted started 270mm in from one of the ends of the veneer leafs. I choose not to start from the edge because I wanted a specific grain orientation which started beyond this point.
The off cut sections I kept in order of layup sequence. This is because later down the track where I want to do some further book matching on smaller veneer pieces for another project I will know that the these are in the right sequence. I also number the pieces in the order they came in from the stack.

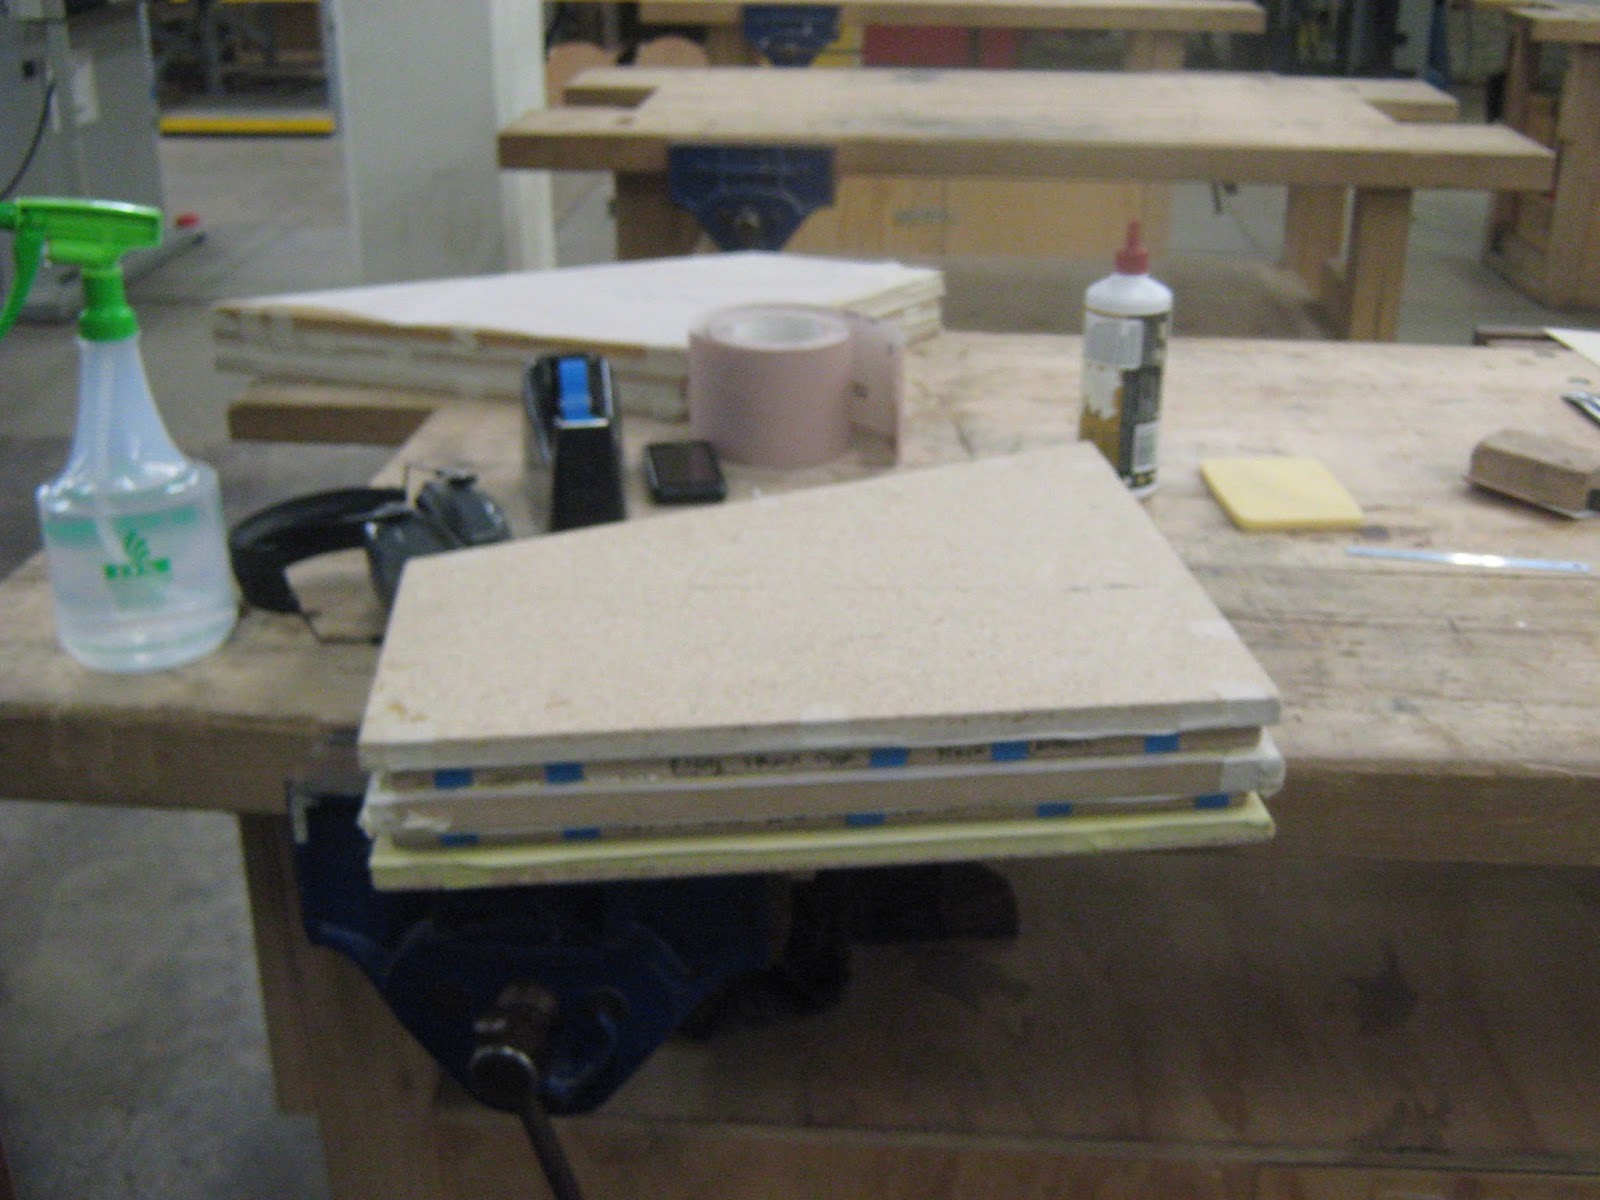
Booked matched sections ready to be taped and cut.

Veneer pieces taped up with their book matching partners and ready to be cut down on joint line.

Due to the cold weather I have been having in my work shop lately the veneers have been buckling even though they have been placed under cauls with weight. This has resulted in some of the veneers splitting when being cut with the veneer saw. These splits I had to repaired with veneer tape. This whole joint section will be covered over any way with the drawer box division. If its the bottom of the base it will be covered over with the central span rail from the legs.

I had to clamp the veneer down and than run the veneer saw up against the particle board piece which acted as a cutting fence.

Booked matched faces for cabinet base are now cut. The ends still need to be slip matched though.

Slip matched veneer pieces to the ends of the central book matched piece. I taped the veneers together with painters tape to prevent veneers slipping apart when using the cabinet base substrate panel on it to trace around it to transfer the shape to the veneers.

Tracing shape onto veneers.

Shape transfered onto veneers. I will keep the veneers to this size when cleaning the seam lines. When I'm happy with the joint I will than cut off the off cut sections.

Cutting veneers for top drawer box substrate panel

Veneers tape and ready for shape transfer.


For the Ikebana base I followed the same steps since it is actually the exact same size as the panel for the top drawer boxes.

Had to remove the brads from the drawer box base panels. Previously I noted that the brads were too long when I was pressing up these panels and that I had to knock the brads in half way than snip half of it off. Some of the brads were still sticking out a bit and I needed to remove them before I did any sanding. If I did not remove these they would dig into the sanding discs and rip them.

The trick to remove them was knock them further out with a small nail punch than carefully remove with the pincers.

Choosing the veneer for the back doors. I did not want to do a 'V' orientation book matching for these since at there moment there is too much book matching. I wanted a good neat slip match but also straight book match.
At first you would book match the inner middle parts between the two doors. But since the doors are spread out far apart it would not be a close up book match but you would still be able to tell they mirrored one another.
I wanted this grain orientation because I wanted the back doors to connect up into a straight book match again with the internal side faces.

First needed to remove the painters tape from the previous press up.

Selecting the veneer and trying to find the right placement that will grab the grain pattern that I want to highlight in the door. I had to get the placement right since I will be cutting off a 20mm offset all round.

Quite happy with this placement. I transfered the back door image to the veneer.

Began doing the slip matching for the outer ends. Well actually this really isn't a slip match its more of a book match since I am using the flipped over side of one of the other veneer leafs to connect up to the other veneer section of the door.

I wanted really good matching for these doors since this is one of the sections that will be heavily highlighted when the cabinet is opened. This meant that I had to cut into larger leafs and create cut outs in them. I did not want to cut down the veneers to an oversize piece than further cut down when seam line is cleaned. This is because I wanted to keep these leafs in one whole piece as best as I could.

This meant using a straight edge piece of particle board scrap and cutting right to where the two lines met in the middle of the veneer leaf.

It seems like a bit of a waste since it breaks up the veneer leaf a lot, but like I said before really needed a good book matching for these doors.

Back doors cut and ready to have their seam lines cleaned. I will be doing this on the router veneer jig but after I test the jig on the other panels first.

Pretty much all my clamping cauls for the veneer jobs were up at my tafe work shop. I needed to make some pressure cauls to press up the veneer to get them flat again. Cut some left over scrap MDF on my cutting station.

Between the layers of the cloth is the veneer pieces. These cloth sections are sprayed with water. Than the veneer is laid down over it. When pressed up they will push moisture into the veneers and over time when bing pressed up it will drawer the moisture out of it and keeping it flat. It will only keep it flat for a little bit when taken out of clamps so that is why its important to be ready to press the pieces up when taken out of the clamps.

Pressed up with clamps and will be left for a while for the moisture to dry up.

Needed to make another two cauls for the straight rectangle veneer pieces.

Also cut this on my cutting station.

Followed the same steps as the above press up procedure.

With this clamp up I needed to add some bricks in the middle to apply more clamp pressure.

Began slecting the veneer for the front door flaps. I wanted the veneer selection to be the same as the back doors. After I selected this veneer I needed to split it down for the two flap sections.

Placed the two door flap sections with one another to mark out the veneer section I wanted to use. As a reference looked to what was chosen for the back doors and made sure that this selection was in the same alignment.

Once marked out began cutting away from the main veneer leaf section with the veneer saw.

First section cut now to get the right book match for the second piece.

Used the next veneer leaf in the stacked up pile. Like the back doors I wanted a very clean book match that matched up 100 percent. This meant taking out a chunk out of the veneer leaf.

First door matched up. This is the left door.

Book matching the second front door flap.

Both doors book matched. The pieces will be cut down to the specific flaps when the veneer joint is cleaned on the router veneer jig. In the mean time to prevent the veneers from buckling will be placed under cauls with weight applied.

Cleaning the veneer joints for the second press up for the other side of the drawer divisions.

Removed painters tape and sanded substrate glue face to remove the adhesive marks.

Scored glue faces than lightly sanded.

Taped veneer pieces together with painters tape.

Applied polyurethane and spread out evenly with painters scraper.

Knocked brads in and taped edges down to prevent veneer pieces slipping away from one another when being pressed up.

Pressed up in press and will be left for 4 hours.

So the veneer pieces would not move heaps I tapped them together with painters tape.

Before placing on the clamps I taped the veneer pile to the bottom plate this is so it would not move when the top plate is place in.
There was a little bit of testing before I even began routering the veneer joints. I was finding that the convex clamp beam was not giving enough clamp pressure towards the center.
These could be caused by a couple of different reasons.
1. The clamp timber edging that acts as the main clamping caul is too far way from the convex clamp beam thus not enough clamp pressure is provided to the middle outer edge where the veneer is over hanging.
2. The convex clamp beam is not curved properly to provide enough central clamp pressure.
3. There is not enough veneer in the middle which if more was added would create more middle pressure.
4. The bottom pressure plate could be slightly bowed in the wrong direction.
To solve the problem in a quick manner I added clamps to the front. This meant that I could obtain better central outer edge pressure to the veneer. Although this meant that I could not make the cut in one go but about 3 goes as I had to reposition the clamps.
I tried also adding more veneer craps to the sides before apply extra clamps to see if this would help more, sadly it didn't.

I decided on using a spiral straight edge cutter with a bearing. A spiral cutter compared to a straight 90 deg cuter would give a better finish. It would create more of a slicing action compared to a chopping action.
I found even with the spiral cutter it was giving a fury edge unlike the jointer. It get rid of this I had to sand the joint edges before taking it out of the router veneer jig. You don't want to sand too heavily since you will create un even spots in the joint.
I tried going the other direction when routering the edges as with some timbers you need to go the other direction due to the grain directions in the veneer. This didn't help at all so I went back to the original direction.
I tested the joints and they seemed good except for a few places. I find that this type of machining only works really well if the cutter is absolutely razer sharp.
The one thing about doing it over the jointer is that to do another re run cycle its a lot quicker since set up time is halved by a lot.

This is what I meant by adding more veneer scrap pieces.

Once happy with the joint I clamped the piece back together since I had to re trace the top carcass panel shape back onto the veneer. This is because I lost some of the sizing when making the cuts on the joints.

Transferring shape back onto veneer.

Cut off cut sections off now the veneer is ready to be taped and pressed to the substrate panel.

Connected the veneer pieces together with painters tape for the figured maple face for the top carcass panel. This face would be the inside face for the top drawer box section.

Before gluing onto the substrate face I needed to score and sand the face to provide a better bonding.
Now this is what I meant before about the dark brown sections showing up under the maple veneer from the plywood. I'm not going to bother placing a counter veneer surface over this as this section will not really get seen at all if the dark brown sections show up through the veneer. A drawer division will be running down the middle plus a 20mm offset will be removed from the outer edging. Also a trenching will be made again on the front and edging will be added as well that will cover up some of the sections. Also no light will be place on these section.
I find the light really highlights the dark brown sections from under the maple. Plus the opening for the drawer box compartment is only 80mm wide so you wont be able to get a really good look inside to try and find it. So I'm not too fust.
Although for the internal sides what do have these dark brown sections they will need to have a counter veneer over it. These faces will get seen heaps.

Applying the polyurethane to the substrate face.

Knocked brads near the veneer joints in the offset sections to prevent the veneers from sliding apart. Some of the joints I'm not quite happy with since there was a bit of a bump. I'm not too fust as the middle joint section wont get see due to the drawer division and the other joints the main bad areas are in areas where they will be cut off or located way up at the back where they will never be seen.
To also prevent further slipping I tapped the veneer down to the substrate panel with painters tape.


Pressed up the job between clamping cauls in the press which will need to be left for about 4 hours before taking out.
Gluing up repair job for drawer box lid.

Before gluing the drawer box lid veneer to the substrate face it needed to be scored and sanded to get a better bonding surface.

Applied the polyurethane glue to the substrate face and spread out with the painters scraper.

Knocked brads near veneer joints in offset sections and taped veneer down to substrate face also add more tape to the joint section.

Clamped up between clamping cauls with F and G clamps.
Cleaning joint lines and gluing up for inside top drawer box panel.

Using the router veneer jig to clean the seam joints.
I was not getting a good veneer joint. I noticed that the clamping caul edges that the bearing had to run up against were not straight and had bumps in it. I had to get this job into the press so I decided on abandoning these process and going to the jointer to clean the rest of the veneer joints.
While veneers are being pressed I would come back to the veneer jig and fix it up. The veneer router jig needed to be disassembled quite a bit to take the bottom pressure plate off and than run the edges of it and the top pressure plate over the jointer.
Over all this jig was merely just a learning experience the jointer still gave a sufficient cut as long as I used the sharpest part of the blades which were the ends.

Running the veneer pieces for the inside top bottom drawer box panel to clean the joints. Placed between two pieces of timber and screws added to the ends.
Had to run the pieces over the jointer a few times since the joints were thrown out a bit from the veneer router jig due to the bump in the edge caul.

Taped the veneers together so they don't slip apart as need to re transfer the panel's shape to it again since some of the sizing was lost from the first shape transfer due to cleaning the veneers.

Transferring the panel shape back to the veneer pieces again.

Removing the offcuts with a veneer saw running up against a straight edge.

Was happy with the joints and tapped the joints together with painters tape.

Scored the panel faces and lightly sanded to get rid of the burr before gluing up.

Spreaded out the polyurethane on the substrate face.

Placed veneer down and lined up middle joint to the center of the panel. Knocked in brads to prevent veneer joints from opening and taped veneer to substrate panel to prevent it from slipping from it.


Pressed up in hand press and needed to be left for 4 hours.
Bottom face of Ikebana panel:

Cleaning the veneer joint lines for the veneer pieces for the underneath side of the ikebana cabinet shelf.

Veneer joints cleaned now ready to re transfer the panel shape back onto the veneer due to some of the shape being lost when cleaning the veneer joints on the jointer.

Transferring shape back. Veneer pieces were taped together to avoid slipping.

Cutting off off cut sections with veneer saw.

Veneer joints taped together with painters tape to avoid slipping.

Polyurethane glue add to substrate surface. Before applying the glue the face was scored and sanded plus water was sprayed onto it to speed up the curing process.

Knocked in brads near veneer joints in offset sections. This will also prevent the veneers from slipping apart. Taped the whole veneer piece to the substrate as well gain to prevent further movement.

Pressed up in hand press. I first did up the press than un pressed it to make sure that the veneer pieces were not slipping away from one another.

Job will need to be left for over 4 hours.

Cutting some scrap MDF that had to make the support base for the mirrored glass to sit in for the four way mirror jig.

Made a 10mm saw slit 20mm away from the edge on two sides for the mirror glass to sit in. The glass was measuring about 4.2mm so I needed to make the slits a bit bigger since the saw blade was 3.6mm

Mixed up a batch of araldiet (epoxy resin) to place in the trenching to secure the mirrored glass in. I wanted the glass for the jig to be permanently secure in the plate.

Used a paddle pop stick to place the epoxy in the grooves.

Lightly knocked the glass in with a wood block and hammer and squared off. This will need to be left for 8 hours plus for it to properly cure.

Mixed up another batch of epoxy resin to glue in the 2nd mirror for the 4 way match veneer jig.

Placed 2nd mirror in jig and made sure was square. Needed to leave this for 8 hours.

Cleaning up the veneer joints for the back doors over the jointer.
The router veneer jig is good but its too slow. The jointer is doing a pretty good job with cleaning the veneer joints.
.JPG)
Cleaning the larger pieces.
.JPG)
Tapped up veneer joint for back doors with the painters tape.
.JPG)
Needed to sand down the panels for glue up some of the panels had some scuff marks on them and left over residue from the painters tape from the other veneer press up on the other side.
.JPG)
Scored and sanded the panels to get a better glue bond.

Again this was my major concern for the back doors. This could have a high chance of showing up under the veneer. I could not sand the panels down any more for the doors due to the magnets. I would be cutting it pretty close if I sanded 2mm off them.

Applied the glue onto the glue faces after spraying down the faces with water to kick start the curing process with the polyurethane.

Placed in cauls and ready to be pressed up. Before putting in between cauls knocked in brads near joints in the 20mm offset sections. Also further taped the veneer to the panel to prevent slippage and to prevent the veneer joints from opening up.

Sanded glue faces for the cabinet base. Again this had some scuff marks and pencil marks on it that needed to be removed before gluing the veneer onto it.

Scored and lightly sanded glue face.

Had to make a new clamp jig to clean the veneer joints since the old one was getting too small.

Began cleaning the veneer joints for both veneer faces of the cabinet base.

Removed the offcuts after re transferring the shape of the base to the veneer.

Taped veneer joints together with painters tape.

Applied the polyurethane to the glue face.

Knocked brads into the 20mm offset sections near the veneer joints and taped the veneer down to the panel.

Placed in between cauls and placed the offsetted shape pressure pads onto it for central pressure. I had to place this job in the vacuum press since it would not fit in the other press.

Even though the polyurethane only needed 4 hours to cure and since I also add water to the glue faces to jump start the cure process it was best to leave this in the vacuum press for longer.

Cleaning off the painters tape from the ikebana panel and the back doors.
Selecting veneer/ book matching for sides, Ikebana base and top drawer base.

Selecting the veneer for the sides of the cabinet. I would like to have a V book match down the middle of the sides. On each end on the same 'V' alignment would be slip matching. Down the middle of the sides would be the main back sawn grain look where on the sides would be the main fiddle back look.

Before cutting the veneer need to work out what length I needed to cut the veneer since some of the bottoms/ tops would be cut off due to the 'V' orientation of the veneer. Needed to make sure it was going to fit onto the base properly and run into the 20mm offset sections, giving me enough veneer to play with.
I used a template that I made to use it as the other mirror shape of the V book match that I would sit next to the drawn shape on the veneer. This would give me an idea whether this would fit onto the rectangle panel shape of the sides.

Great idea to have a selection of rulers as they come in handy when doing stuff like this.

Selected pieces of veneer that I was going to use for the 'V' grove book match for side one.

Taped the two veneer pieces together to prevent them from slipping when being cut.

Double checked book matching to see if I was happy with it before cutting it.

Used the mirror jig as a clamp press to hold the veneer while cutting off the off cut sections.

V book matching done for side one.

Cutting veneer for next book match.

Now this is where I went wrong. When doing matching book matchings its best to check the veneer layers in the stack and see how much the grain patterns will change from one layer to the next. Even though these matchings are in order of veneer sheets there is a very large change in grain patterns. I will end up using these pieces for the fiddle back slip matching on the sides though but will need to pick some more veneer for the V book matching.
Veneer is a natural product and you are not going to exactly have everything matching up 100 percent but you can still get pretty close. That is why I don't want to use these sections as the main V book matching and will cut new pieces. A little bit costly but thats how we learn.

This is the section I'm wanting to include in the middle of the V book matching for the new pieces.

Checked the next 3 layers down and there really wasn't any huge changes in the grain patterns between each veneer leaf.
Coming back to number the leafs in the pack, this is why its so important to do it. In this case lets say I checked the layers first to see whether the V book matching was going to match one another properly. I would need to break up the layer numbering of the pack. Doing this would be ok since I would know what sections matched one another quickly even if the pack was broken.


Cut the four new leaves I needed was quite happy with it the really only thing that changed was some of the sizing in the grain pattern shapes.

Taped veneers together to prevent them from slipping from one another when cutting.

This is one of the reasons why you cut on the offcut side. The veneer saw slipped and smashed through some of the veneer.

V book matchings a lot better now I need to do the V slip matching for the fiddle back for both sides.

Using the rulers again as borders to show me how big the out side veneer slip matching pieces need to be.

I was able to use the first V book matching pieces as the fiddle back slip matching sections. I could have done a perfect book match if I wanted to but this would mean cutting into the other veneer leaf layers and just taking out this section. It seemed not worth it since It would totally brake up the middle section of the long veneer leafs. I was able to do some really good slip matching that matched up quite well.

I had thought about using 4 way ( diamond matching) for the Ikebana base and the top internal section of the top drawer base.
This is where the diamond matching mirror jig that I made came in handy.

I played around with this to get a matched that I like. I used a lamp to get more light to see the matches properly.

I was more fond of this matching since it gave off the appearance of a butterfly. This would be perfect to use in the middle of the panel. I may not be using this veneer pattern orientation this is merely just to see whether the idea will work with the shape of the panel I'm using.

Marked out the cut sections for the matching on the top veneer and began to cut out the rough cut sizings of veneer.

These are the four pieces I plan on using in the diamond matching pattern.

Lined all pieces together and tape up to prevent from slipping away from one another when cutting and stuffing up the matching.

Clamped veneer pile down and began cutting off the offcut sections.

Again you need to make sure in your diamond book matching that all the pieces are going to match as best as you can. There was too much change with the grain between the layers and some of the matching doesn't seem right.
After a bit of playing around I came to the conclusion that this 4 way book matching would not work well for the specific shape panel I was using. If the veneer leafs were wider this could be achieved. This could also work if I add in a different back ground veneer that would contrast to the diamond matching in colour (ie the wenge). But this may seem out of place since everything else would be blond inside the cabinet. Plus I didn't want the paneling to be too complex and take away too much attention away from the Ikebana arrangement.
I had thought about adding in stringy inlay down the middle of the veneer joints probably a dark inlay like some wenge.
Due to this unusual shape there would be a few different veneer grain directions. This could look good or bad depending on how it is done. But in the end I thought it would look to busy.

Although this made me think a bit. I had thought about making an Ikebana base that could be moved away from the cabinet if I had some extra time. I had thought about having the four way matching in the middle of the the Ikebana tray. I had thought about cutting the diamond matching into a curved diamond shape and place it into the tray top. The tray holder would be shaped into a diamond curved shaped with legs.
More designs and experimentation would be done on this later on. This is one of those things that can easily be add to the piece when ever. So I would not be working on it unless I had extra time.

Instead of doing a 4 way book matching for the Ikebana base and top drawer base I decided to do some V book matching.
Selecting the best grain match.

Cutting off the off cut section.

The V book matching for the tops and bottoms are from the same order of veneer leafs but they are slightly different due to the changing grain shapes between the layers. I don't mind this since it gives the piece extra character. You do need to remember that this is a natural material.
This one will be used for the Ikebana base since it has more character than the top drawer base one.

This one would be used for the top drawer base.

V book matching down and now the other book matchings need to be done to the sides.

Selected the veneer leafs that would be used for the sides. I was only using a little bit. I wanted to get a really good matching for this especially the Ikebana base.

If you sore the cut line with the veneer saw you can than use scissors. This wont split your veneer since the score line is acting as a stop cut.


Veneer selected for Ikebana base and top drawer base. Triangles made on joint lines so parts don't get mixed up. Next the joints need to be cleaned than they can be taped than glue to the substrate faces.

Began cleaning the veneer joints for both the bottom and the top sections for the front door flaps. Cleaned the edges on the jointer.

Working on the bigger sections of the front door flaps. I decided to machine the veneer joints when the bottom and top door flaps were in one piece. This meant that it would require less passes across in the jointer in the press jig.

Once I tested to see whether the joints were clean and were tight I cut down the top and bottom sections with the veneer hand saw. I used the straight edge to obtain a straight square clean line.

Tapping veneer pieces together with painters tape.

Connecting veneer parts for bottom door flap section.

I had to sand the substrate glue faces first since there were some scratch marks, adhesive marks left over from the wenge veneer press job and some grit marks. I just used some 120 grit on the orbital sander.

Scoring and lightly sanding the substrate glue faces before laying down the veneers to get a better bond.

Since there was veneer laid down on the fold line edge I needed to lay some blue painters tape down so the expanding foam from the polyurethane would not get onto it.

After spreading out the water over the substrate glue face from the spray bottle I spread out the polyurethane with the painters scraper.
Both the left and right bottom front door flaps are in the pressure cauls and ready to be pressed up.

Pressed up in hand press and will need to be left in it for four hours.

Scoring and lightly sanding the substrate glue face for the figured maple. The other press job was done at tafe as for the top front door flaps it will be pressed up at my work shop.


Did a dry run first to see whether I was going to have enough clamps to do this press up and also to see if it was going to provide the effective amount of clamping pressure.

Applied the polyurethane glue after spraying down the glue face with water from the spray bottle. Applied painters tape to the fold line to keep it clean.

First layer laid down, brads knocked in near the veneer joint in the offset sections and other edges taped down to the plywood panel with painters tape.

This is probably due to the moisture that is in the air from the fold weather that has been occurring but it seems like the join line gets tighter and more cleaner when taped up first and left for a while. This would be due to the cell structure of the timber expanding due to the moisture.

Veneered panels between pressure cauls and is ready to be pressed up.


Used 'F' clamps to press up this veneer job. Needed to make sure that the pressure was spread out evenly.

Glue beginning to expand. This will need to be left for over 4 hours.

Took the panels out of the flaps. I was quite pleased with the veneer joints with this very clean and you can hardly see the joint.

Removed all the painters tape from the panels and now is ready to be sanded than cut down to size.
Last veneer press up for base.

The veneer joints had already been cleaned when I did the last press up for the other side of the base. Began removing the off cut veneer pieces.

Taped up the veneer joints with blue painters tape.

Scored and sanded substrate glue face.

Sprayed down substrate glue face with water to kick start curing process than applied the polyurethane glue with painters scraper.

Knocked in brads to prevent veneer joints from opening up and taped down veneer edges to substrate. Placed in between clamping cauls and placed into vacuum press.

Placed into vacuum press and placed center pressure cauls onto it as well to provide effective clamp pressure in middle. This will be left for over 4 hours to dry.

I wanted to try and do a different veneer joint cleaning method. I tried using my circular saw to cut the veneer between to mdf cauls.

The circular saw cuts it well its just trying to get the effective clamping pressure is the problem. Due to the guide fence its quite cumbersome to get a clamp in to press down the cauls to get effective pressure across the whole pile of veneers. You can get effective pressure at the ends its just really hard to get pressure in the middle.

I decided on making a jig that would hold the veneers in place when cutting them. I thought of placing screws around the edges and adding in a top caul plate at the front and add in toggle clamps that would place pressure on the cut line when running over the table saw.

Sadly this did not work and I scrap it and went onto you tube to look for some jigs that were used to cut veneer on the table saw.

I came across a very good jig to use which seemed quite simple to make. I had t cut some plywood parts though for it which I was able to cut out of some scrap sheets I had in my workshop.
http://www.youtube.com/watch?v=r6Wf118Xf7k veneer cutting jig for table saw make this one.

The jig that I saw on youtube to cut and clean up the veneer joints was quite simple to make. It only required 4 pieces of plywood and a few screws.


A few more screws had to be added to this one. Reason for this was because the plywood was slightly bowed. This was hoop pine ply plus I wasn't able to use a 25mm thick base which was stated in the video I was only able to use 18mm. In the video it talks about using birch plywood.
One of the reasons why this would be important would be because it doesn't bow as much due to the thiner alternating layers in it. Plus compared to the jig I made and the one in the video they have used a thinner width middle clamping beam also I think it is a bit longer.


The principal of this jig works it just mine needs a bit more work on it. I was able to get effective clamp pressure in the middle and also at the very ends. It was just in one particular area it would not press the veneers down. This section of veneers was quite buckled.
I tried cutting it on my table saw in my work shop. I was getting a little bit of split out. It is important to run the grain in the right direction to not get break out. The veneers I was cutting the grain was going in both directions due to the angle of the V orientation chosen for the book matching.
The figured maple also tends to have alternating grain any way. My blade was quite blunt and was not a finer toothed blade. I decided to also see how it would cut at tafe using their saw.

I was still getting split out on the grain when cutting the veneer through the jig on the panel saw. It was mainly splitting at the area that was not clamping down properly. I reckon this jig would work on other veneer that wasn't so buckled. The figured maple veneer needed to have a very clean jig and I wasn't going to be able to obtain it with this jig. I decided to abandon this and attempt to go and do it on the jointer again.

I had to make another two clamp cauls to hold in the veneer for the sides to clean the joints when running over the jointer. The first pass consisted 8 veneer pieces between the cauls. Than the second set up for the sides only required 4 veneer pieces for doing the other necessary joint sides.

With this also you need to make sure that the grain is going the right way so it does not chip out. Unfortunately the grain changes in direction and chipping out happens. In this case the grain direction needs to face away from the oration of the jointer blades. You can usually tell from the direction of the growth rings.

This is a diagram that shows cutter rotation and grain direction in which the board should be placed over.

The grain for some of the Ikebana base and top drawer base was a little bit tricky. This was more the middle joint section for the two large veneer pieces. I was having splitting problems due to the grain going in different directions. The fiddle back doesn't help as well in some cases.

Had planed these sections to get a cleaner joint. Although my hand skills need more practice.


Taped veneer pieces together down veneer joint with painters tape. To get a tighter joint I decided to not press up the veneer to the substrate that day. I wanted the joints to become tighter so I just placed them under some boards to keep them flat. The moisture from the air will expand the veneer more and make the joints tighter.
This should close up some of the small gaps. Blond veneer is really hard to hide the joint so extra measures need to be taken some times.

Cutting off the off cut sections that are not needed. These off cut pieces will be used later down the track for other projects.

Scoring and sanding the counter veneer faces that will have glue applied over it and have the figured maple veneer laid over it.

Applying the polyurethane over the glue faces for the ikebana base panel and top drawer base panel.

Knocked in brads near joint line in offset sections and taped the veneer down to the panel to prevent further slipping when being pressed up.

Placing between clamp cauls and baking paper.

Placed in press and now will need to be left for four hours plus.

Scoring sand sanding glue faces on the counter veneer for sides.

Making baking paper glue blankets.

Applying the polyurethane glue to the sides. When laying down the veneer need to make sure that its being place up the right way in connection to grain direction of the wenge on the other die. I drew arrows in which way the veneer needed to be placed on the edges.

Taped down to the panel and knocked in brads next to the joint lines in the offset sections. Placed in press and will need to be left for four hours.
No comments:
Post a Comment