I needed to do some further testing with some other glues due to the problem with the open vein pocket cavities in the wenge veneer.
Needed to solve the problem with the glue showing up through the pockets. I decided to do some tests by gluing the wenge to the birch plywood substrate.
I choose 5 glues they are
- Tight bond 2 which is just a stronger version of tight bond 1 which is a yellow AV 180.
- AV 56 which is a white melamine glue which has good stretching properties its like AV 180 but you don't need as much. ( my friend suggested this)
- AV 180 yellow glue. Even though I have tested this I thought I would give it another go since I did not apply it properly on the old test piece.
- Polyurethane. One of my friends who owns his own business and is a fine furniture maker suggested this to me. He said that polyurethane works well as its stronger absorbs moisture out of the joint and expands and fills up cracks. But the main positive with this is that it melds well with stains and oils. It doesn't show up really bad like yellow glue. You don't get any cupping or movement with polyurethane as well.
You need to apply it with a scraper (painters, plasters) preferably a metal one.
The only down side is that it requires more cleaning, its more expensive and you have to work faster since the open work time is shortened. Also you need to leave it clamped up for longer.
- Tight bond 3. I have used this in the past and it drys brown. Very strong and water resistant. A lot stronger than the other tight bonds.
I bought some new paint metal scrapers from Bunnings. Had to remove the stupid stickers. Used eucalyptus oil to break down the paper and adhesive. This cleaned it up really quickly and easy.
Cut the wenge parts to be glued down on the birch plywood. These were just left over pieces from when I cut all the substrate parts out.
To cushion the pressing I used some news paper also to avoid the veneer from sticking to the cauls I used baking paper. I made a bottom and top caul for each test piece. This was also from offcuts from the birch plywood.
Before gluing I sanded the glue faces with 240 grit sand paper and scored the faces to open up the poors to create a better glue bonding.
First glue test was the tight bond 3. I used a paint roller to spread out the glue evenly. This will give a better indication as to how much of the glue presses through the veneer when pressed.
Pressed with a bottom and top caul along with baking paper and news paper in the press layers. Pressed up with F clamps and left to dry for about 2-3 hours. To prevent slipping I also taped down the veneer to the substrate.
The next test was the polyurethane I just applied this to the substrate with one of the little scrapers that I bought from Bunnings. The larger scrapers are more for the bigger jobs.
Clamped this up using four clamps. I had to leave this for about 6 hours to dry. It was pretty warm that day so drying was going to be a lot faster. Most of my veneering is going to be happening in the end stages of Autumn so its going to be quite cold which will mean drying time will need to be extended making things take longer.
With in 10 minutes the glue had already started to begin its expansion ( curing).
The 3rd test was the white AV 56 melamine glue. I can see what my friend meant you really don't need to add that much with this glue compared to the AV 180 yellow glue. I applied this with a pain roller as well to get a better even glue application.
Clamped up and will be leaving for 2-3 hours. All the tests have been number and noted as to what time they have been clamped at.
The 4th glue up was the tight bond 2.
The 5th and last test was the AV 180 yellow glue. I thought it would be best to do this test again since the first one didn't have the glue applied to it properly.
Was a bit shocked and annoyed that I might be able to use the polyurethane since how much of the glue bled through. Although after sanding it the patches dis appeared pretty quickly.
Tight bond 3 you could see some of the glue coming through the vein cavities.
Tight bond 2 had a lot more patches coming through the vein cavities compared to the tight bond 3.
The AV 180 was even worse although the AV 56 wasn't that bad only had a few.
This is what the polyurethane came up as. This was a quite quick sanding process. I reckon I would get a better result with a bigger piece and spending more time on it.
I will have to be careful when taking off the tape from the veneers. Wenge is so brittle and the masking tape can rip out parts of the grain. It will be best to add moisture to the tape and carefully remove from the veneers.
I need to sand all the parts with the orbital sander than do hand sanding with the grain to clean up the glue marks. I wanted to test the danish oil with these different glue tests. Usually when veneering its best to pick the right glue that is going to go with the right finish.
I don't tend to use brushes much any more. I came across this in a polishing book I bought ages ago. Its called a polishing bun. There are many other names for it but this one is easy to remember.
What you do is take a cotton rag preferably white. There were no white rags in the work shop at tafe so I had to settle with a light blue one. Don t pick rags that are greens, reds blacks etc. The dyes in these materials can cause a reaction with the oil or stain your using and can cause bleeding from the fabric onto the material. I find red does this a lot.
You want to cut the rag into a square and cut a squarish sponge from a car sponge ( use a brand new clean one out of the packet)
Next you want to fold it over a few times over the sponge than twist it tightly. I find wrapping an elastic band around it helps to secure the sponge more in the rag and prevents the rag from opening up.
You want to poor the oil your using into the a separate container. Always get into the habit of doing this since it helps to not contaminate the other oil left in the tin. Plus you want to be able to dip your polishing bun into it when ever you need more for the sponge to absorb. The good thing about this is that you can control how much you apply. If the sponge has taken too much in just press it against the inside of the contain, or if you need more dip it into the container of oil again.
I find applying it onto the timber surface is so easy. Go in the direction of the grain. Make one streak application than follow onwards across the board over lapping by about 1 third each stoke. You don't want to press the polishing bun onto the material tightly. You just want to run it across the surface smoothly.
I find you don't get paint brush lines, streaking or bubbled patches. Like I said it is so east to apply.
I will go into more depth when at the oiling stage with this.
Using this polish bun is good for waxes as well which I used on the router/ saw station.
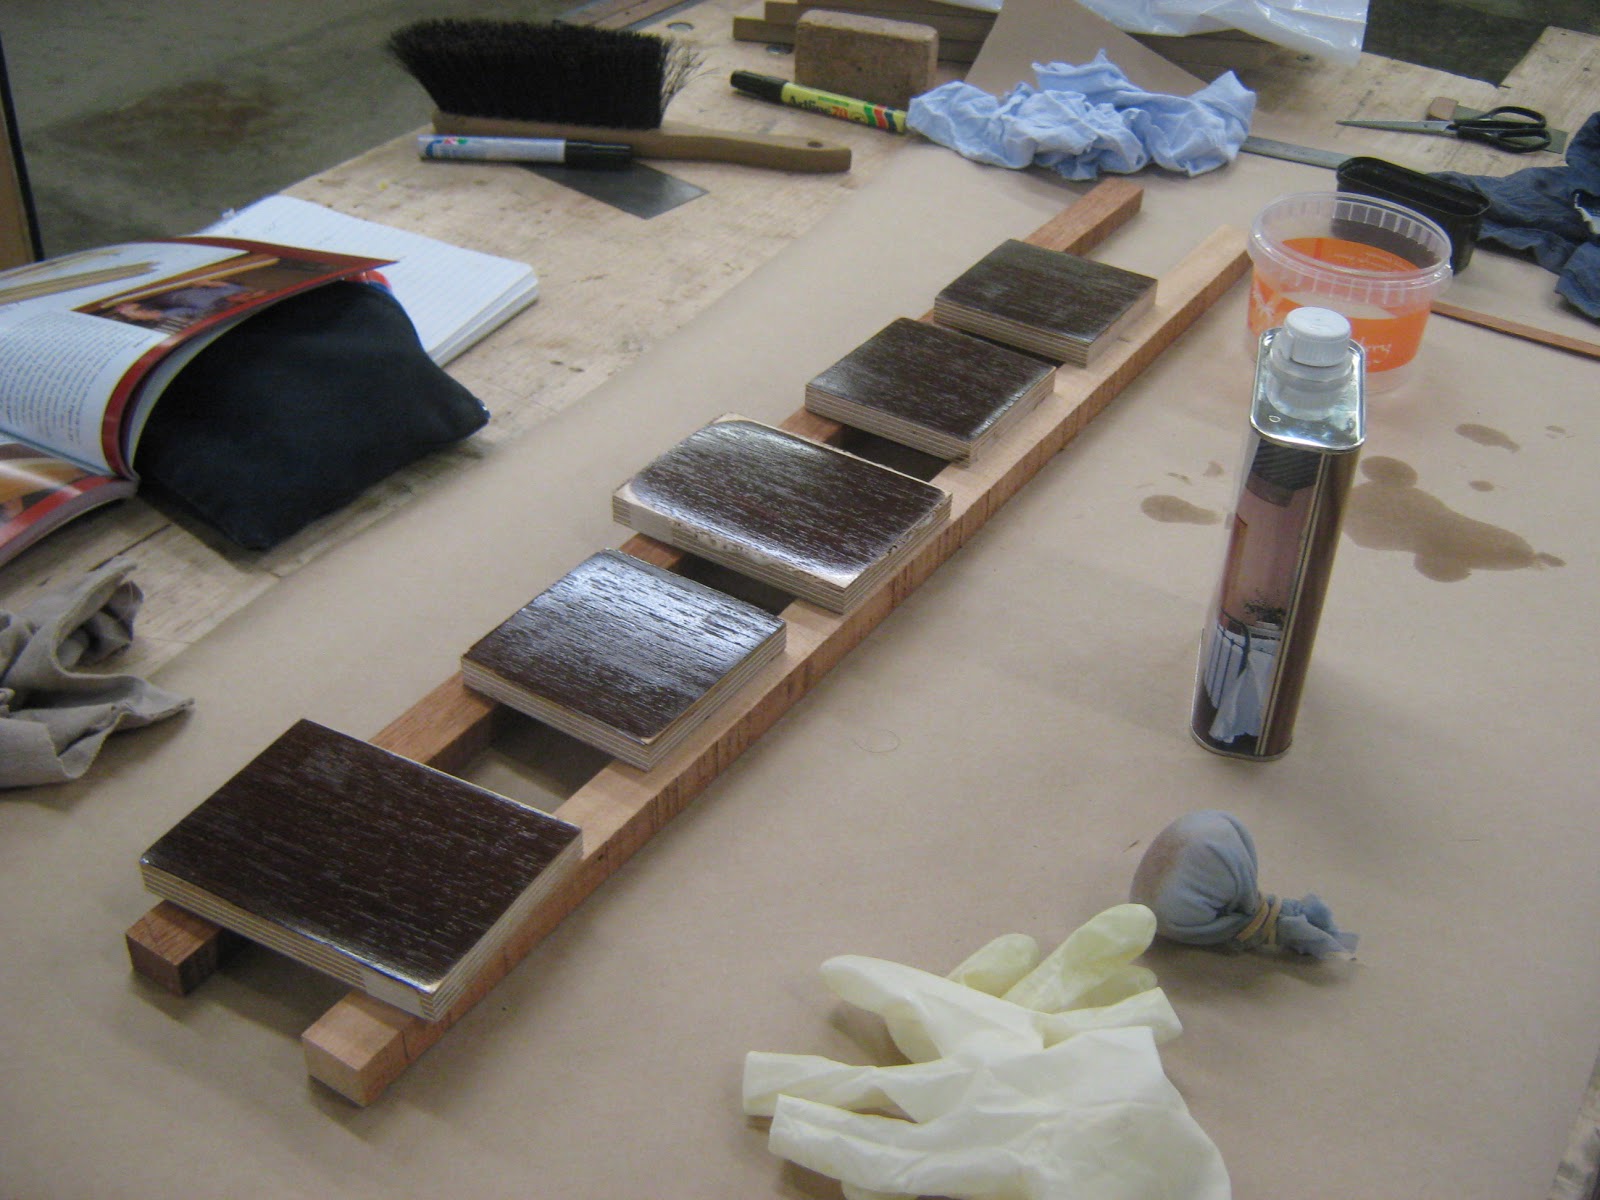
I have not used danish oil before so I though this glue testing stage would be a good stage to practice with the danish oil. Danish oil stinks a lot so its best to do it in a well ventilated area. I always use gloves when im finishing.
So I knew what was what I placed the glue names on the back.
Out of all of them the polyurethane worked out the best. There was no sign of glue marks.
There were glue marks on the tight bond 3 test but not heaps. But this is a small sample so this would double on bigger jobs.
A lot more was noticeable on the AV 180 compared to the tight bond 3 but not heaps.
Not many glue sections showed up on the AV 56 only a little bit but they were still noticeable.
Still showed up glue patches was about the same as the AV 180.
When it comes to veneering the figured maple I will also need to do some tests as well.
I needed to do glue tests for the figured maple just like what I did with the wenge. The figured maple has a totally different cell structure to the wenge so most likely any glue here is going to be sufficient to use.
Wrote the glue names on the bottoms of the test plywood pieces.
Scored and sanded with 240 grit on all glue faces of the plywood test pieces.
Besides the polyurethane I applied all the other glues with the paint roller. As for the polyurethane I just used the paint scraper.
Clamped all the test pieces up with F clamps. I just used the drawer box back cauls to press these up.
Will be leaving all these test pieces for about 3 hours to properly dry.
Once dry took the test pieces out of the clamps. I ran the orbital sander over the pieces using 180 grit running first across the grain than with the grain. This is really to just get rid of the bulk of the waste. After this I used 240 grit than 320 grit and ran with the grain but hand sanding. You last sanding should always be done by hand.
Setting up to oil the parts with Danish oil. Using the same principals as before.
Danish oil applied over test pieces. I am only going to do one coat. I will do further tests later down the track when I get to the finishing stage. This test is merely to see how the finish reacts with the glues used.
Left for about four hours. The fiddle back in the figured maple looks really nice under the danish oil. I reckon this will really stand out when more coats are added to it.