
Will be using these as my carrying cases for the veneers. I needed a protective case where I can carry them from work shop to work shop before laminating them to the birch plywood panels. Also can keep my edging and veneer tools and other supplies in here as well.
Will also be a big enough case to store veneers in before they are going to be clamped.

I bought I large A1 size case and 2 other individual cases 1 A3 and 1 A2. This will help me to keep the different veneers separate also the veneers ill be using for the marquetry down the track if time allows me.

Finally the book I wanted arrived. Ill be using this book along with my veneer sample folder when talking with the people at George Feathers when buying my veneer. I should be going to see them in the next couple of weeks. I thought this would be a good book to use for research and take along with me. The more information I give them as to what I'm looking for the more they will be able to help me.
Got this book through book depositary.


Book is not just on veneer but also on heaps of other things like the science behind wood species different types of wood species, Japanese hand tools etc. But the section on veneer is so helpful since it goes into the different styles of veneers.
http://www.gfethers.com.au/overview-3.html
To ensure the timber veneer component of your fitout meets
your expectations, we recommend you take the following steps :
1. Contact Fethers for a polished sample of your desired
finishes. These samples will include log numbers to allow us to identify the
logs sampled at a latter date.
2. Please provide Fethers with information on the
project.
3. Specify the product with full details including :
1 - Veneer Species and log number as per samples supplied.
2 -Type of Cut - Crown Cut, Quarter Cut etc
3 - Veneer available from Fethers Veneer - Ph 03 96465266
4 - Matching Type - Book Match, Slip Match, Radom mis-match etc
5 - Order of sequence matching required is indicated on
drawing.
6 - Direction of grain is indicated on drawing.
7 - Substrate : MDF, Particleboard, Plywood etc
8- Polish type, gloss level, UV inhibitors and level of
grain fill.
9 - Contractor to supply indicative finished sample of
veneer prior to project commencement.
In addition to all of the above, we always encourage
everyone to take the time to visit us in Port Melbourne to view and select the
specific veneer for their project if possible.
This is the information ill need to bring along with me to the veneer supplier.
Some of this information I wont really need to tell supplier since ill be figuring out this as I go deeper into the project
Product details for project:
1: Veneer species: Wenge which will be the outside panel veneer. I'll talk with the veneer suppliers as I have been thinking of curly figured maple or beech but now I have been drawn to Maple birds Eye. I will get some advice than make my decision there. (pricing could effect the choice as well) Birds eye can be quite expensive so getting some more information in store will be beneficial. Birds eye Maple falls under freak-figured veneer. If price becomes more of an issue I have also looked at American Maple quarter cut. The veneer inside I don't want overly decorative since it will take too much attention away from the Ikebana arrangement. But I still want some characteristics with the veneer that look pleasing to the eye. So plain quarter sawn American maple may be too plane.
2. Type of cut I'm wanting a quarter cut for the Wenge if possible. The Wenge is getting cherry blossom marquetry on it so I don't want a heavy grain with curves. A crown cut is more of a decorative back sawn look.
3. I have contacted George Fethers and they do have Wenge but its in small widths ranging from 130mm-150mm. They also have American black walnut that I had also thought of using as an alternative to the Wenge, but if I can I'd rather get the Wenge. If I was to get the Walnut I would be wanting to get a quarter cut cut for the same stated reasons as above for the Wenge. As for the other veneers I have not contacted them yet so will find out on the day when I go and see them. If I cant get some of the veneer that day I can afford to come back and grab the rest latter on as I can start laying down the veneers for the veneer I already obtain.
4. Matching type: I'm wanting to have a book match matching type. This is not as overly important for the outsides as a Slip matching can be used since the marquetry will be taking most of the attention away plus it will be a quarter cut cut so the grain wont be overly noticeable if it is a slip match. But If I can I'd like to get a book match here. Although the matching for the over lapped doors I'd like to really match up well. The book matching I really want to get is in the inside section since the marquetry wont be displayed on the veneers. Due to the diamond/ arrow shape of some of the paneling I reckon a book match presentation will be very pleasing to the eye, especially when the whole cabinet is opened and creates that light cream contrast to the dark brown/ black.
5. The order of sequence matching I'll be figuring out my self. I cant really get this moving till I obtain the veneers. This is because I don't have a defendant idea how wide the leafs will be and what colours and patterns are available.
6. Direction for grain I have and will be shown to the suppliers if I need to but most likely I wont need to show them this.
7. Substrate is Birch plywood sizes ranging from 4mm,15mm, 12mm, 21mm and 25mm.
8. Polish type I have not decided on what to choose yet. I have been told danish oils and waxes go really good with it and provide a fantastic rich colour to it (this is for the wenge) Will be asking for some advice to the suppliers and maybe obtaining some oil samples to get a rough idea if I can
9. Doesn't really apply to me. But will be doing tests on the sample veneers with oiling and gluing before pushing forward in the processes. This is to obtain the best glue to use and the best finish to use. Planning the project out so no mistakes happen.
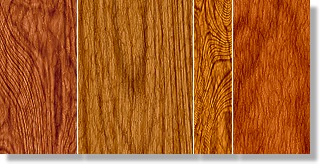
These are not the types of veneers im using but this just shows what types of veneer matching there are.

Book matching
Alternating pieces of veneer are flipped over so they face
each other as do the pages within a book. This creates a pleasing, symmetrical
pattern.

Slip matching
Veneer slices are joined in sequence without flipping the
pattern. If the grain is straight, the joints will not be obvious.

Pleasing matching
Veneer is matched by color but not by grain pattern
Random matching
Random matching is just what it sounds like. Usually done
with lower grades of veneer, the leaves may be of varying width, colors and
grains
There are other complex forms of veneering as well like radial, diamond, four piece matching and many others.
.jpg)
Examples of four way matching from the veneering and inlay book that I purchased.
.jpg)
Some examples on diamond matching from the Collins complete woodworker's manual book that I purchased
.jpg)
(information from http://www.oakwoodveneer.com/tips/match.html)


I drew these images of the different sections of the final piece concept a while ago. I will be taking this along to the veneer suppliers so they get a rough idea as to what I'm wanting to try and achieve with my project.
Sadly with this supplier which it isn't a biggy you cant just rock up to the company you need to make an appointment, even if you already know what you want to buy.
I am currently waiting for the email response to make an appointment to go and see them. Basically in the email it just covered the project in short depth and what I was wanting. Further specs would be covered in the appointment. I just went off the information they wanted to know about each project from their website which I noted above.
(email to supplier)
Dear Sam,
I rang up earlier today and spoke to Tim and he told me that I needed to make an appointment.
I'm free all this week for any times to make an appointment.
I'll basically explain as to what I'm looking for but will explain in more depth in appointment.
I'm currently a apprentice doing their final piece and was wanting to purchase some veneer leafs.
Im looking at purchasing two different veneers Wenge and the other a Figured Maple or a Birds Eye Maple. If the Wenge is not possible to obtain I would like to use a American Black Walnut instead. The Wenge or either the Black American Walnut I would like to have quarter cut. (if this is possible) This is because on the veneer im doing marquetry and dont want a heavy grain that will take the attention away from the marquetry. The marquetry is only going on the wenge which is the outside veneer of the cabinet. The inside veneer will either be the figuered maple or the birds eye maple. For either the Wenge or American Black Walnut the darkest you have, but like I said would like to discuss this further in an appointment.
I'll explain as to what the concept will look like and grain directions and other specs through the concept images that I have drawn when in the appointment with you.
As for the figured maple or Birds eye Maple Id like to discuss this with you in person as to what would be the best option.
I Will be mostly doing book matching with my veneers due to the shapes of the piece and where they will be located in the concept.
I understand that you guys dont split up packs which im willing to buy a full pack of both of the veneers but would like to discuss this in person through appointment in more depth.
Im gluing these veneers on a substrate birch plywood which I have already cut. I cant use a already veneered manufactured board because of the complex shape of the concept.
The oil finish I have not 100 percent decided on but I'm thinking of using danish oil and waxes.
My contact details are email (use this same one I check it about twice a day)
My mobile: 0422574644.
Looking forward to meet you in appointment to discuss this project further.
Any further information would be highly appreciated and thank you for taking time to read this email in regarding to an appointment.
Before the appointment is there any other information that I would need to bring to you that will help that I have not specified here?
Thank you,
From Benjamin Reddan

Since I wasn't able to go down and get the veneer yet till an appointment was booked. I decided to go and buy the tools I was going to need for the veneering also for some other stages later down the track. The only veneering by hand that I have done is at tafe so I didn't have any tools that I was going to need for hand veneering.
The tools I bought were.
1.Pax veneer hand saw
Will be using this for the cross cutting for the veneer.
2. Pax fine inlay hand saw
Will be used for the fine inlay sections im doing, spline work and some of the marquetry.
3. Tri Burnisher
Used in the sharpening stage for cabinet scrapers.
4. Japanese marking knife
Will be using from the veneer work and the marquetry also to mark out some of the joints as well as acting as a scoring tool to prevent split out. ie for the spline sections in the veneered drawer parts.
5. Veritas cabinet scraper holder (comes with a cabinet scraper)
Used to hold the cabinet scrapers so hand doesn't get tired also able to control better pressure. Will be using the cabinet scrapers a lot with the veneering and the marquetry.
6. Japanese flush cut hand saw
Will be using this to clean up the over hang from the dowel plugs from the magnet housings before the veneering. The cabinet scrapers will also be working in hand with this tool as well for this specific job.
7. Japanese Ryoba hand saw.
Used for some of the joinery, cutting the splines and other exposed joinery in the cabinet moldings. Will also be used to lightly score the inside (glue face) of the veneer before gluing up. This is to further open up the poors of the veneer. Will be doing a very light crossing pattern. Need to not go too deep most of the veneer is only .6mm. So lightly scoring it. But also lightly enough not to damage the blades.
8. 4 cabinet cabinet scrapers straight made in France . .4mm, .6mm, .8mm, 1.0mm.
Used to remove high spots and get surfaces flat before sanding and to remove the adhesive caused from the veneer tape when taken off.
Later on I'd like to purchase my self one of these.
http://toolsforworkingwood.com/store/item/GT-VSAW.XX If I am to do any more veneering after final piece or probaly later down the track for final piece I'd love to get my self a set of these veneer saws.
9. Latest edition of Australian Wood Review
Because I love it.
10. painters tape
To hold down veneer leaf parts. (this is not to be used for the veneer leaf joints, veneer tape is a totally different tape. The adhesive is activated when water is applied.
11. kitchen sponges
Will be placing one into a plastic container with a little bit of water for it to soak up. You drag the adhesive side of the tape over this. You only want to add the right amount of water to activate the adhesive. Too much or too little will make it not connect properly.
.jpg)
Will have to remember this if I come up to it in my veneering. Came across this article on making a very unique bed frame by a maker called Neil Erasmus. I found this in the Australian Wood Review No 77. Found this to be a great way to flatten veneers if they become buckled. Will have to test this one day on buckled veneer to see how it goes if I don't run into this with final piece.

I bought my veneers from George Fethers. They were located in 740 Lorimer Street Port Melbourne.
This is the front of the company where customers would go in. Parking is a bit annoying since this are there really isnt much parking in this industrial section.


The veneer storage section they have is huge. Heaps and heaps of pallets full of different kinds of veneers. They don't just store a lot of natural veneers but also manufactured ones and chemical dyed veneers.
Check out their website http://www.gfethers.com.au/


All the packs have weight placed on them. When storing veneer you need to have the veneers sitting flat with some added weight on them to avoid them from buckling.

Will helped me out and was able to give some veneers that I could use for my marquetry.
I was able to obtain from him Babinga Rose wood which is from Africa, Khaya Mahogany which is also from Africa and Atlantic Jarra. Each of these samples were A4 size.
I was also able to get some veneer tape off them as well. The amount they gave me seems like it may not be enough but I'll ask my tafe teacher where to get some as I have been trying to find a supplier who sells it. I need the veneer tape to join the leafs together before pressing them on the substrate.
If I'm needing more veneer for my marquetry I'll probably end up going to my original supplier Peter Scott Young since he has a lot of different veneers that I can buy in small quantities. The figured Maple which is one of the major veneers along with the wenge that I bought will also be used for some of the marquetry as well.
I bought 14 square meters of wenge. The leafs were 200mm wide. As for the figured maple I bought 19.5 square meters, the leafs were 300mm wide. These were in already made packs.
Each pack will be a section of the log that is cut. Each pack will be different in its width quantity and appearance. It really depends on what the log looks like.


I was talking to the head manager and he said the next time I come in this whole section will be changed. They were in the process of changing everything. This would be their show room that shows their different kinds of veneers. Will who was the main manager showed me through here to see what I was after. Showed me dark timbers that were dyed with ammonia and also showed me wenge in its crown cut form compared to its quarter cut form. On these samples they also had finishes on them so you would get a rough idea what it would look like when finished.
For example wenge looks darker when oiled and waxed.

They were able to roll up my veneers and place them in a box which made transportation so easy. I was thinking I was going to have to lay the whole bundle of veneer leafs down in my tray of my ute.

I cleared a space in my work shop to place the veneers on. I bought some melamine from Bunnings to be used as a base and a top to keep the veneers flat when in storage in my work shop.
\

I should have organized this before I took the veneers out of the box. The veneer leafs were too long. The board I got was 2400mm long and the veneer leafs went about 400mm- 600mm over it. The pack was sticking too much out in the entrance way to the work shop plus a lot of heat is on this side of the work shop. Also since the veneer bundles were at different heights and widths keeping a controlled pressed weight would be a bit difficult.
I decided to cut the melamine down to a width that was more suitable for the veneers. For the figured maple since it was 300mm wide I made the base and top 320mm wide. As for the wenge which was 200mm wide I made the base and top 220mm wide. I also decided to rearrange some stuff in the work shop and move this whole section to the other side of the work shop where It was the coolest part of the work shop and no sun gets to it.
I had thought about placing it on the melamine and put it on the ground since it would be cooler but this would cause a tripping hazard plus also I have a rat problem in the work shop and didn't want the rats pooing or weeing on the veneer since it would really stain it. Plus with this set up you get more air flow and I can also store stuff under it.


I ripped down the melamine panels with my Festool circular saw. I needed help with this from my dad more so to just hold the off cut when finishing off the cut so it wouldn't drop on my foot plus also wouldn't tear out on the exit cut.
The new mobile dust extractor I bought made such a huge difference. A really good investment no dust any more. When cutting stuff like this its best to have the dust pipe and electric cording from the power tool sitting around your neck and running down your back. You will find that it won't get in your way while cutting.

This was the first time I had to join the 1400mm saw guide and the 1000mm guide. So glad that I made this investment.

These sections of the veneer leafs I had to cut off show when being stored they would have better support on the 2400mm long board. The off cuts I would still be using as I would be using for the smaller parts in the final piece so they will not be wasted.

Since all the leafs were pretty such the same length all I had to do was measure out 2400mm, mark than cut with scissors. I used the off cut as a template to draw the next line on the underneath veneer leaf.

As you can see that the veneer leafs of the figured maple are slightly buckling. This is most because it is crown cut. The wenge was buckling that much as it was quarter cut. There are other factors as well wider veneer leaf different timber structure ect.
This section is on the other side of the work shop.

I may be going over board with this but I have not stored veneer before. I clamped down the boards with F clamps and taped it down as well. I placed bricks on it for extra support. Now I'll keep the figured maple like this till I need to use it. Ill do all the veneering for the wenge first than un clamped the figured maple bundle.

The veneer leaf shorts for the figured maple also had to be clamped and weight placed on it.

Beginning to cut the wenge veneer leafs down to 2400mm length. Did the same cutting principal I did with the figured maple.

The wenge pack will sit next to the figured maple pack. The top waste weight board is than added than bricks are added to it for extra weight.

The work horses are spaced out evenly to spread the weight load over the whole area. Once I'm finished with all the veneering what ever is ever left over will be place on the top racks with weight added to it to avoid buckling and to keep it out of the way. Placing it in this set up is so its easy to get to.

Bought chalk and fold back clips. The chalk was to be used to mark the veneer leafs that would show how they are going to be joined. They would also show what part they were going to be for and how the grain was to be laid. This is to ensure that the veneers at laid in the right direction in accordance to other parts.
As for the fold back clips they were to be used to fold the veneers together while I transport them to school to be veneered in the press.

What I'm doing here is making a veneer leaf joint jig. I wanted a faster process to clean the joint edges of the veneer leafs. So what you do is sandwich the veneer between two piece of timber and clamp or screw on each end. You will run this across the jointer and it will clean the joint edge for the veneer leaf. The only thing is is that your jig gets smaller and smaller until you need to replace it and make another jig.

Marking jig parts.

Began cutting the veneer leafs to size with the pax veneer saw. I used a large heavy straight piece of timber that was in my work shop to use as a straight edge to cut the veneers.

The first thing I was going to veneer was the cabinet sides. This was the only part of substrate that was ready to be veneered at the time. The wenge was going to be displayed on the outside of the cabinet.
I was able to get one leaf for each side of the cabinet with a little bit left over. I left enough to play with for clean up on the veneer leaf joints. What you want to do when veneer matching is having the growth on the veneer facing up in the same direction as if of a tree.
i.e if the grain growth is large at the bottom than tappers towards the top you want the big section placed on that panel that is going to be the bottom of the part for the cabinet. Although this is quarter cut so strong growth rings are not noticed. You can tell a little bit as to what direction the grain is running in.
Now you also have to consider grain colour as well. If you have even colours than its pretty easy. If you have light to dark colours you want to create a colour ascending or descending placement. It depends on where the part is going to be located and personal taste.
i.e since these are the sides do I want them to be lighter at the front than becoming darker towards the back or the other way around? I decided on having darker to the front than lighter towards the back. Most of the grain was the same colour.
Wenge tends to lighten up when placed in the light for long periods of time. Some suppliers ask to have timber laid out in the sun before being further milled so it lightens up.
There were some selctions of lighter coloured wenge at George Fethers but I wanted a dark colour.
This veneer matching is not book matching its more a combination of slip matching and pleasing matching. Having the grain running together well enough to hide the joint but still having the colour placement running effectively.

Once I was happy with the colour matching and grain matching with the veneers. I marked the veneers with A triangle that crossed over the whole section of veneer leafs that were going to go together for the substrate panels. I also number them and drew a arrow to indicate which was the bottom and also a L or R to indicate which was going to be the left side of the cabinet and the right side of the cabinet.
This will give me a better idea as to how I want the veneers placed on the panel before gluing. Also when machining the edges gives me a plan to go back to when putting the veneer leafs back in the same order.
I have had some experience with veneering and certain glues. But I thought it would be best to do some tests first to see how well the wenge would bond to the substrate. I was using going to use Tightbond Yellow glue for this.

For choosing the right face to glue down there are a few ways to know whats the best face to glue down.
The back face of the veneer is called the open face. The other side which is the good face is called the closed face. The open face has a coarser face and does not finish up well. You will be able to tell from touch also appearance. There will still be some veneer saw marks left on the back from the mill.
In the picture above the concave curve section is the open face the convex curve section is the closed face.

Veneers are now ready to have there joints cleaned than taped than glued down onto the substrate.

This is what I meant with the folding back clips in how I was going to use them. This is just for transport to hold the veneers together to avoid them from braking while in transport to school to be glued in the press.

Placed the veneers into a plastic bag for further protection. Ill be placing this in the folio bag but the reason why I have placed it into another bag is that in the folio bag there will be other things in there.

The chalk, veneer leaf joint jig, japanese hand saw, japanese knife, pax veneer saw and many other things will also be sitting in the folio bag along with the veneers.

I tend to like collecting the off cut of the veneers since they can be used for other projects like marquetry projects.

When gluing up veneers you want to score the substrate panel to open up the poors to produce a better glue bond. You can also do this with veneer but it is in some ways highly not recommended only if the veneer is really thick, thicker than the standard .6mm. I decided to see how well this would go on the veneer so I lightly scored it in a cross hatch pattern. Although very very lightly.

prepared the birch plywood scrap piece and the wenge veneer scrap piece for glue up. I rushed to get this into the press since I would need to wait for about 2-3 hours before taking it out to see how well the bond went.

Before running the veneer leaf joints over the jointer I needed to remove some of the damaged sections first on the edges of the veneer leafs. The wenge quarter cut veneer is very very brittle and breaks very easily.

Screws would hole the top jig section to the back section and press the veneer in the middle. This would than be run over the jointer.

Unfortunately I did not have much luck with this. The screws were not press the jig together another to tightly secure the veneer. There was too much gaping in the middle which resulted in the edges of the veneer leaf chipping out. The pieces of timber had too much of a bow. If clamping in the middle was possible this could be fixed. But with these veneer leafs I could not do that since I didn't have clamps at tafe that had a longer neck height.
I decided to obtain thicker and straighter timber pieces to replace these.

I managed to find some Fijian Cedar in the timber stock section in the machine shop at tafe. These pieces were a lot thicker and were a lot straighter. This pressed the veneers up a lot more when using clamps F clamps compared to screws.

With some jobs fences do need to be removed or adjusted to complete the work at hand. The guard that covered the jointer blades at to be pulled back and lowered heaps. This meant that some of the blade was exposed. When running the jig over the jointer blades I needed to make sure that the clamps would not interfere with the guard but also when not grind up against the jointer fence. Clamps needed to be totally tight so not to drop while machining.

Even with this new jointer jig for the veneer leafs there were still some sections of break out. These were not that bad. I could cut these sections out when placing the marquetry in later down the track. Or place small wenge veneer sections to cover it up. I have not worked with such a brittle veneer like this before so A few paces and further cleaning up of the edges needed to happen.

The blue chalk marks show where the break out sections were. I couldn't do further clean up as I was already dropping past my 20mm offset size for the veneering. Place there is still a chance that it would further break out the same or even worse.

The next stage was to join the leafs together with veneer tape. This veneer tape bonds to the veneer when moisture is added to the back section of it. Having a sponge in a container and running the back of the veneer tape across the sponge activates the adhesive. Its not a very strong adhesive bonding but strong enough to keep the veneer leafs together and still weak enough to remove when cleaning up. You only add the veneer tape to the top section of the veneer never the bottom. Even though it is thin placing veneer tape on the bottom will cause the veneer to raise in the sections where the tape is. This can not be repaired and sticks out a lot looking very unpleasant.
Even though this tape is placed on the top sections of the veneer leafs. It is still relatively pretty weak so care needs to be taken when moving the veneer panel section around.

What I do is cut small sections of veneer tape and connect to the the veneer leafs first. This helps to draw the veneers together tightly making a lot better joint. After this I than place a really long piece of veneer tape down the middle of the joint to create extra strength.

Veneer leafs ready to be pressed. But before pulling out the glue there still needs to be some preparation taken out first for the pressing.

To press veneers up properly there needs to be some extra things included in the pressing sequence to provide a good bond and a controlled spread out clamping pressure. I cut up some non grease baking paper that spread across the whole surface of the veneer panel. What this was going to do was to prevent the veneer from sticking to the other press parts. Moisture from the glue will draw up through the veneer and will stick to things. The veneer is only .6mm. Since im using a wax baking paper moisture wont stick to it and will keep the veneer face cleaner.

Other parts that are needed in the pressing of veneers are the top caul and the bottom caul. What these are are boards that are the same length and width as the veneered substrate board. Usually a bit thicker than the actual veneer substrate board. If the veneer substrate board is thick than the cauls can be the same thickness.
To prevent the cauls from sticking to other parts encase glue comes in contact with it I covered them with butchers paper. To prevent the paper from slipping off the cauls I just taped it to them with masking tape.
The cauls also speed up the glue dry time. Since the press im using is cast iron it is very cold. Having this cold metal on its own pressing onto the veneer will mean that the panels will need to stay longer in the press. Also the cauls prevent damage to the press pads and keep glue away from it. Also if the pads are damaged the cauls also do the reverse thing as well and prevent the press pads from damaging the pressed veneer.
Since I was going to press both of the sides together in the press there also needed to be a middle caul added into the press. What this would do is even out the clamp pressure and also further prevent the two veneer panels from sticking to one another. The middle caul had butchers paper on each face.

I lightly scored the veneer to open up the poors with one of my japanese saws but using the teeth that are designed for ripping. The teeth for cross cutting are too fine and would damage them. You only want to lightly and I mean lightly score the veneer. You don't want to add hardly any pressure just let the saw do the work its self. You just want to make the back of the veneer slightly coarser to open up the poors to create a better bonding.
You can also score the substrate or just score the substrate and leave the veneer. But when scoring the substrate you don't want to go too deep. You want to use the same pressure as with the veneer. Going too deep will create pockets which could have the chance of the veneer falling into when being pressed.
It seemed to work well for the test piece but this maybe different to the real thing. Will access on whether to keep doing this by seeing what the result is when I take it out of the press from school.

This was the Japanese hand saw I used. This saw is designed for cross cutting but also ripping.

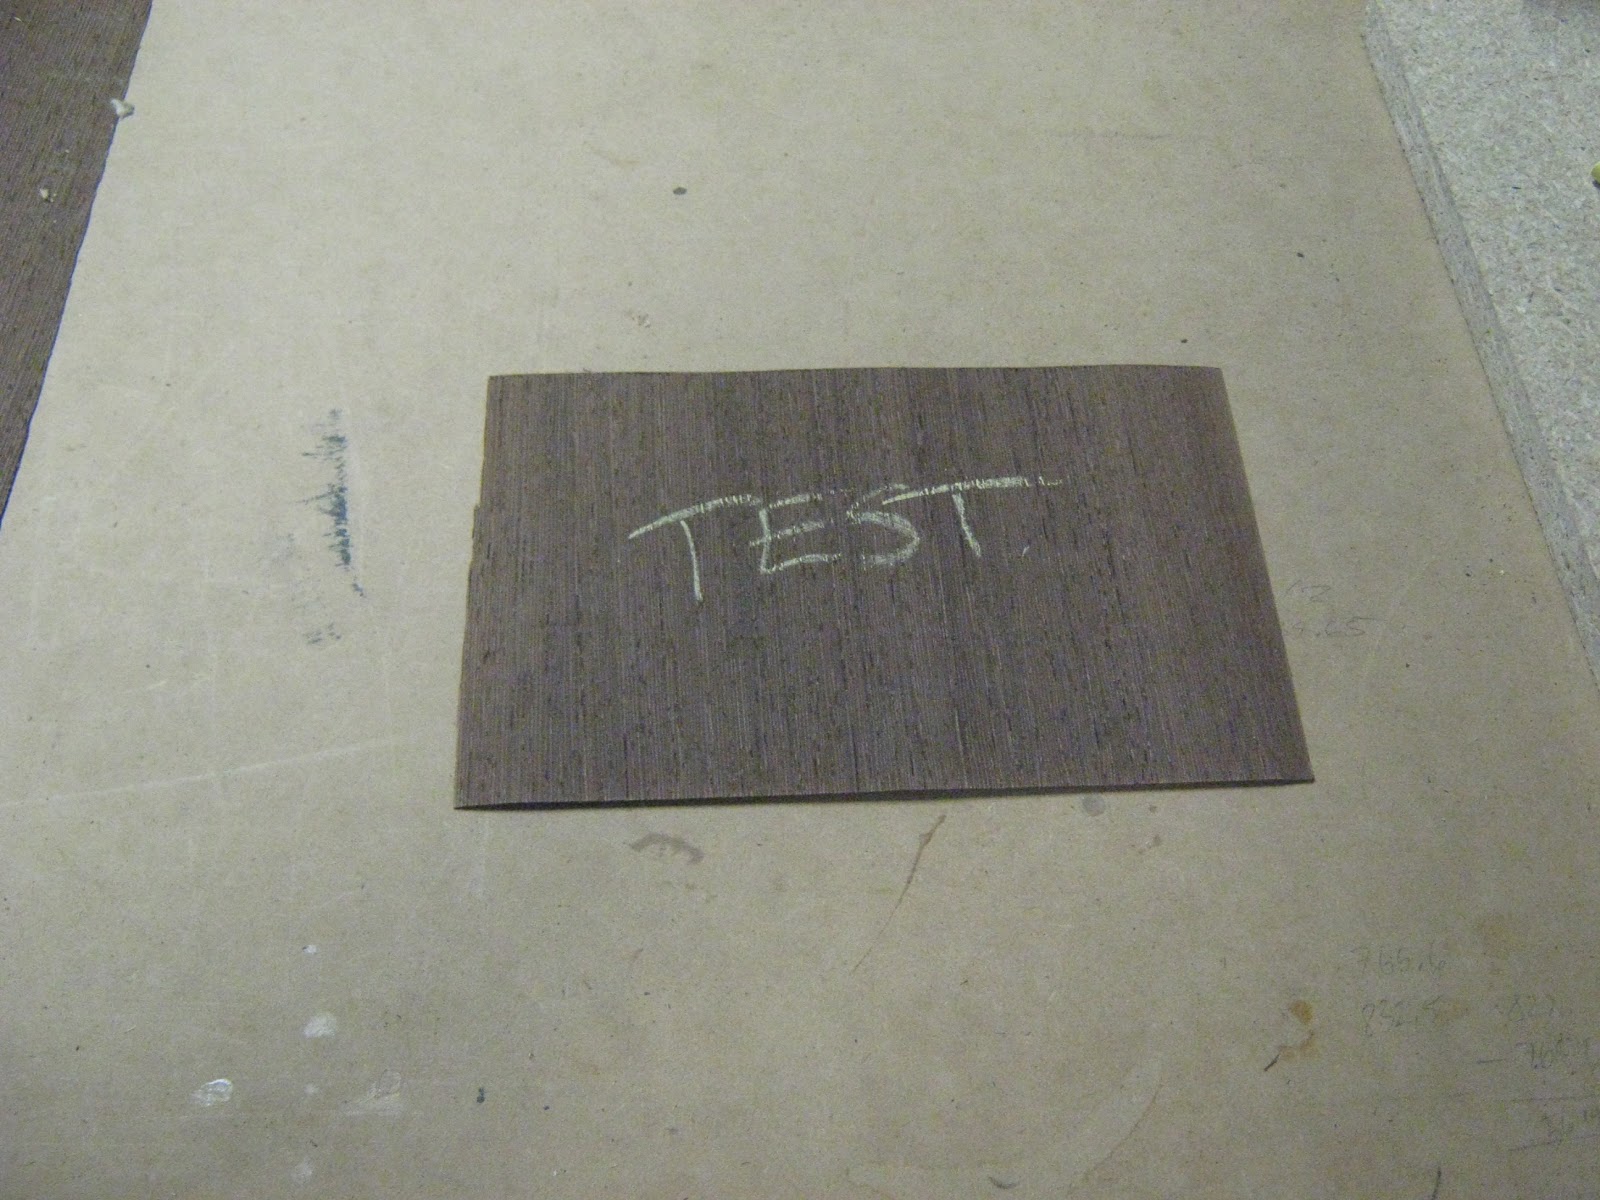
This is what you want to avoid with the veneer before applying any oil. This is just water added to the test piece after it came out of the press. Moisture will draw through the veneer from the glue and this will show up adhesive splotches. These need to be cleaned up with cabinet scrapers and hand sanding before any oil is applied to it.

I applied the glue with a foam paint roller and placed the glue in a disposable paint tray. Applying the glue like this will give a great even bonding surface. You don't want to add too much but at the same time you want to add the right amount. What I do is roll the roller into the glue a few times than apply it across the panel. You want to go in a few different directions to spread out the glue evenly.

This is what you want to be left with before you lay the veneer down onto it. An even glue application across the whole panel.

To avoid the veneer from slipping when pressing it in the press you want to lightly clamp it down to the substrate on the edges with masking tape. All this is doing is to keep the veneer in place. At the time I didn't have it but I like using painters tape for this. I just used normal masking tape. Painters tape leaves less/ or no tear out. I will need to be careful when removing the this from the veneer.

Job pressed up in the press. I will look at this the following week to see how it worked.

As you can see the top plate is the top caul which than has butchers paper added to it. Second is the baking paper. than its the first veneer and substrate. After this its butchers paper again than the middle caul than butchers paper again. After this its another layer of baking paper than the next veneer and substrate. After this it is butchers paper again than the bottom caul.
Grain matching drawer bases

In the mean time while I wait to take out the pressed veneer from the press I decided on working on the next few things that need to be pressed.
What I'm doing here is cutting out the wenge veneer and colour matching it for the drawer bases.


This can be easily stuffed up and not done right. I had to go back to the computer drawing and life scale drawings to see the layout of the drawers to the rest of the shape of the cabinet.
The drawing of the cabinet above is just done on google sketch up. The left drawer box is just the right draw box but flipped over. This is the layout of how the drawer boxes will be sitting like in the cabinet. The longest side is the inside.
Time needs to be taken to ensure that the right orientation and placement of the veneers is done properly.

I used the veneer leaf off cuts from what I cut away from the 2400 long leafs of wenge. I was able to get two half pieces from each offcut piece.

I marked out the sections with white pencil since it made it a lot easier to see when cutting the shapes out from the veneer leafs with the scissors and veneer saw.

The secondary half piece that was cut out from the same veneer leaf offcut section to the previous one was able to be attached to its partner as long as it matched in grain direction and colour. I had to make sure that I grabbed off cut leaf pieces that were roughly the same colour and grain matching across the four bases.
Same process as before marked the joint across the veneer leafs with a triangle drawn from yellow chalk. label each part so it would not get mixed up with the other bases. I also marked as to what base it was. Whether it was the bottom right, left or the top right or left. This was just done with a basic coding system that refereed to the cutting list.
i.e B standing for bottom and R standing for Right.

Veneer for bottom left base cut out and ready to have joints cleaned and pressed. With the veneers I made them slightly over sized to the substrate. This is because the shape will drop in size when cleaning the joints.

To make these quicker I could use the bottom veneer bases pieces as templates for the top veneers for the top bases.

All veneers for bases are ready to have joints cleaned and pressed.

While waiting to be pressed to ensure that the veneers would not buckle I weighted the veneers with a top and bottom caul plate and added some bricks to it for extra weight to prevent veneer buckling.

I wanted all the internal parts of the drawer to match one another in colour and grain orientation. The sides needed to match the base as best as they could.

Normally you would get all the veneer parts from one leaf and just sort of match it up in a folding pattern figuration. But I had heaps of offcuts after cutting them to form the 2400mm leafs so I wanted to use them.
This didnt matter so much just more time was spent in colour and grain matching. All the leafs were from one log so it didnt cause too much trouble since most of it was pretty easy to match one another.

I tried to use the off cuts that had the most crummy sections that I could cut around first. These crummy sections I could still use later down the track for some of the marquetry or other projects.

Some of the veneer I had to do some small repairs on it due to splitting.
.JPG)
There was a strong brown straight grain section that ran through most of the wenge pack that I had. Thought this would make a great feature by having it running right around the whole internal section of the drawer box parts. This was also a good indication on where the matchings needed to happen.
.JPG)
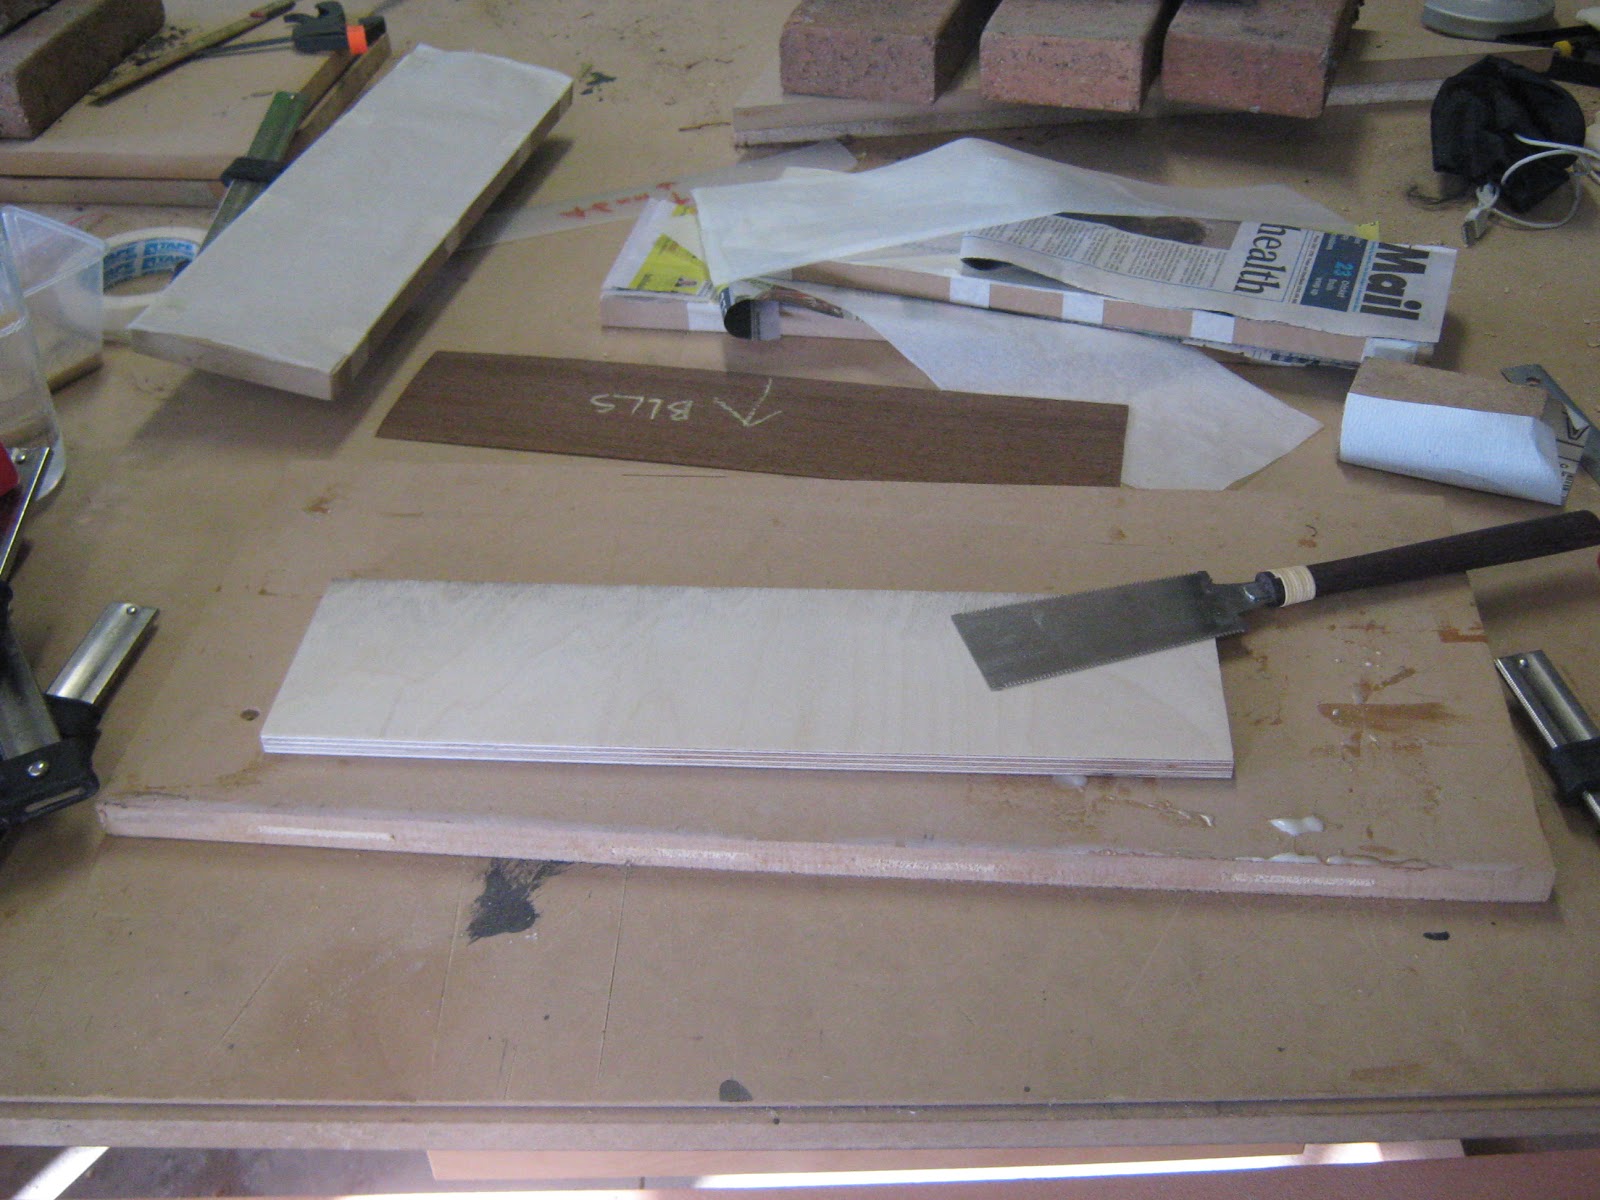
I placed the base veneer down with the other parts as well to make sure that it matched well with the sides. The side parts also needed to be marked like the base. This is so I know where the veneers need to be pressed also what placement all the parts are going in.
The arrow indicates which is the bottom and the top. As for the coding it just describes the part.
i.e BLLS stands for bottom left long side. I also needed to mark the parts as in which drawer it was going to be in either to the top left or right or the bottom left or right just like with the drawer bases.

Marked out the parts for the bottom right section.
These small parts prob wont need to go into the press they can be pressed up with F clamps. You just need to make sure that the pressure is being spread evenly over the whole clamp job and that your using a top and bottom caul.


Unfortunately I ran into a bit of a problem. This was a silly problem more on me.
One of the characteristic features with wenge which looks good but can be a huge problem is the vein pocket cavities. The cavities are pretty much all over the whole veneer. Now the veneer is .6mm deep. The vein pocket cavities can be about .1-.5mm in depth some of them go right through. The cavities can go straight up at 90 deg or slightly slant.
Now the problem with these is that when the glue drys and the moisture draws up from it it fills these cavities. Pretty much with any veneer and any glue you use your going to get glue patches. All this is is just the moisture from the glue trying to escape. These glue patches you can get rid of by using cabinet scrapers, orbital sanding and hand sanding. These in fact are not the issue its the dry glue still stuck in the open cavities.
When you apply moisture to it either water, meth or an oil these white glue sections caught in the cavities show up like white little specks.
I couldn't have this since it would make such a huge problem for cleaning up, plus would stick out too much when oiling over it. Too bad I already pressed up too wenge panels with this glue. The glue I used was a tight bond 1 yellow glue, which is pretty much AV 180 Yellow glue. I think I just got too excited to get along with the job. What I should have done is more testing.
Now with this above test sample I didn't evenly spread the glue out with a paint roller which is what I did with the pressed up wenge panels. So the glue in the cavities might not be as bad.
Before continuing any further with pressing the wenge veneer on the substrates I decided to do some more test with other glues.

I decided to talk to one of my friends who won apprentice of the year last year and had used a lot of veneering with his piece. Also he had used wenge veneer before.
I few things he asked me besides the glue was what substrate was I using and whether I was counter veneering. Counter veneering you tend to do over anything that isn't plywood like timber for example. This is just making it more structurally sound. I wont go into this heaps since Its not needed that much but pretty much counter veneering from what I gather follows some of the principals as plywood in its structural properties. First time I heard of this term.
He said that he did about 6 glue tests before choosing the right one. Well he actually used a combination of some. He suggested to do some testing with AV 56 which is a Melamine laminating glue. Now this glue is white in colour and is pretty much like AV 180 a bit its just it has more stretching properties which means you don't need to use as much.
He also said that he used some water down PVA as well.
Another thing that he asked me as to how I was applying it. He said to use a foam paint roller to spread the glue out on the substrate.
( go to glue testing page post since there is a lot more info on the glue testing.)

I came across this book on marquetry along with a book on veneering and inlay. I thought to buy this since it would be a great book to draw references from when I get to the marquetry section for the piece. I will discuss this further when coming up to the marquetry post.

Now for this book this is like the bible for veneering and inlay. I actually got a lot of the different glues to use for my testing from this book. Got some good pressing techniques from this book as well. The glues I got from here I have talked more about them in the glue testing post page. I'll be talking more about this book and the information in it in later posts down the track.


Folio veneer bag packed and ready to take to tafe to press up some more stuff. I'll be pressing up some of the drawer bases.
Sides out of press


I got the wenge veneered pressed panels out of the press that tafe that I pressed up a week ago.
Unfortunately It did what I was expecting it to do. The scoring of the veneer didn't effect this which I was lucky. From now on I will only be scoring the substrate material. This will take a lot of cleaning. What I will be doing is removing all the veneer tape with scrapers than ill be lightly scraping the panel with the cabinet scrapers as well than sanding it with the orbital sander. Now with the orbital sander you need to use a very fine grit. Go straight to 240 grit any thing under this is too high. Remember the veneer is only .6mm thick. After this you will do hand sanding in the grain direction.
With sanding with the orbital sander you will go across the width of the panel first than up the panel. You don't want to stay in one position for too long and let the sander do he work you should never place pressure on the orbital. All the orbital is doing is getting rid of the bulk of the waste. Its doing the main cleaning. The hand sanding is getting rid of the pig tale marks made from the orbital sander and making it smoother.
The masking tape used on the edges to hold the veneer in place on the substrate so it would not move while pressing will need to be loosened with moisture than pulled off. You don't want to try and pull it off like it is now since you will tear out some of the grain from the wenge. Most of this will be cut out since it is in the 20mm offset section.
To make sure that there is no adhesive left from the veneer tape, masking tape and no glue is still in the vein pockets. I will be going over it with meth in a damp rag and also using a spray bottle with water and a rag to wipe over the panels. I'll be setting the spray bottle to mist as you don't want heaps of water going onto the veneer. What your doing here is placing moisture onto the veneer which will act as an oil. This is just showing whether there are any adhesives left that still need to be cleaned up.
Good thing about the meth is that it drys very quickly. When spraying the water on you want to spray water on the back as well to avoid buckling. Most fine furniture makers who use veneering but use animal hide glue don't tend to like doing this since it can break and loosen the veneer from the substrate. The moisture weakens the glue. I find this is effective as it shows adhesives that need to be removed before oiling takes place also it shows whether there are any weak spots like splits, bubbles, lumps, dints etc that may have been caused from pressing.
Better to have these sorted out before oils get applied to it.
I wont be sanding the wenge veneer until the figured maple is applied to it. This is due to double handling plus the wenge could have a chance of getting scratched again when being placed back in the press for the figured maple.
I will discuss in more depth when coming up to this stage in a later post.
Dressing the veneer joints for drawer bases and pressing.

Before pressing the veneers the joints had to be cleaned up on the jointer. Same principal as before when doing it for the larger pieces. This didn't chip out hardly at all since it was a smaller piece and there was more clamping pressure. For the other parts for the sides of the cabinet the veneer was mainly splitting in the middle as there was not enough clamping pressure in the middle.
I could not use the F clamps at work since they were too big and they could cause too much weight on the small piece. We did not have any smaller F clamps. We had smaller G clamps but I did not want to use them due to having the chance of the G clamp tightening bar slipping down and hitting the jointer blades.
I decided on using the small quick grip clamps that we had in the work shop.

Some joint sections had to be cleaned again with re cutting it with the veneer saw before running it over with the jointer.

Next step was to join the two pieces together with veneer tape. Again like before placing small strips down first than one down the middle to tightly pull in the joint.

All base veneer sections ready to be pressed. There were some repairs that needed to happen as well on some split veneer.

Before pressing I had to prepare some of the baking paper to cover the top, middle and bottom cauls also cutting some butchers paper.

Also sanded the substrate sections with 240 grit sand paper and than scored it with the Japanese hand saw to open the poors to create a better bonding.

Polyurethane is quite poisonous it has Iso symite in it which can cause some cancers. So its best to use this in a well ventilated are wear gloves with it, mouth mask and safety glasses.
When using the polyurethane glue you don't want to use heaps since it expands. I cant use the foam rollers you have to scrap it out evenly on the substrate with a painters/ plasters scraper. I found this small one worked very well for smaller veneer parts. I found squirting out what you needed onto the substrate from the bottle first than scrap all the glue out to cover the whole panel than scrap in the direction of the grain worked best. I scraped it out evenly and wiped any excess on a rag. Again you don't need heaps of glue since it expands.

Pressed up in the veneer press and needs to be left for about 4-6 hours. I didn't take any photos of the glue spreading since I had a very short work time and didnt have time to take pics.

I still used a bigger bottom caul. I didn't need to add one to the top since this could cause un even pressure and could cause the veneers to bulge.
I'll show some more pics with the other two base sections that need to be pressed since in this press job there is only two bases. You don't want to try and press too many things at once as mistakes can happen plus you have to work faster since your work time (glue work time before it starts the cure process) is cut down because you have to do more.
The pics will indicate how to have the orientation of veneers placed in the correct sequence to avoid pressing wrong faces etc. I marked the long face on the cauls this told me that the veneer substrates had to have their long edges to this side. You have to think more carefully when your dealing with left and rights in veneer projects.
Grain matching the top of cabinet.
.JPG)
Laying out the veneers for the top cabinet. I wanted to use the off cut sections from the veneer leafs when i cut down the leafs to 2400mm lengths. I wanted to use these sections since they all matched one another since they were the ends of the leafs under on another.
This is one of the reasons why you number your leafs in the order of the pack as this will show the order of layers in which the log was cut in.
This is slip matching. Slip matching is best used for stripped veneers where the joint will not be obvious.
The main thing I had to ensure with this was that the spacings between the strips was right. The two middle strips had to be central to the top panel section. Here I'm talking about the large brown strips. Below under the grain joint sections I'm talking about the finer stripped grain that runs throughout the whole leafs
The spacings between the dark brown strips needed to be brought down to 70mm on each leaf. This was to ensure that everything was going to look even and neat when looked at it from a distance.

Most of the stripped grain is running parallel in the panel section. It tends to run out of parallel outside the diamond section towards the top.


To hide the joints with slip matching the strips need to run parallel with on another to true up the figure.
Wenge is a very dark timber especially when oiled and waxed so the grain wont be highly noticeable compared to other timbers. Although its always best to get things as best as you can.
Some of the grain is not running parallel to one another at the moment but I still need to dress the joints. Plus some of the attention will be taken away from the grain when the marquetry is added.
You will find that the veneer may appear lighter your darker depending on the direction it is looked at. The tones look a lot better when the strips start from the front of the top.
I tried rotating the leafs on a 360 deg turn to try and match up colour and grain better but was not working. Some of the colours don't match up completely its more the grain that matches up. But like I said the Wenge will become very dark when finished.
.JPG)
First I drew the diamond shape of the top on to the 4 selected veneer leaf off cuts.

Diamond shape transfered to the veneer leafs. Used white pencil a lot better for darker veneers. Now this shape is going to change since I need to take out sections and re arrange pieces to make the grain figure true.

The middle leaf towards the right needs to have 40mm taken off it towards the middle. As for the far right towards the middle 40mm taken off it as well. As for the middle left veneer leaf the outer section needs to have 40mm trimmed off it as well. These 40mm trimmed sections will still be used as they will be place on the outer sections.
.JPG)
I need to take time and do this properly as I would like to try and match up this dark brown line with the back doors and front door flaps if possible.

Before cutting the 40mm strip sections off I tend to over lap the veneers on the 40mm section to see if the joints are going to match up properly.
The far right veneer section has the inner section cut off.

This section is just the middle left leaf and the far right leaf flipped over. The finer face ( closed face) is always facing up where the slightly coarser face (opened face) is facing down. Some veneers its hard to tell which is which. Luckily with the wenge its easy. the opened face is more grayish plus you can see the veneer saw marks on it made from the mill. Plus the touch is easy to tell the difference. Plus you can tell from the curving of the veneer as to what is what. the convex curve is the closed face and the concave is the opened face.
Generally the opened face is laid down on the ground work.
This is why its important to mark with arrows what is what so when coming to pressing you don't get confused.
To visualize a repeat pattern on the grain a good tool to use is a mirror. Hold the mirror vertically and slide it over the surface of the veneer. When you have decided what is the best place to make the cut you can draw your cutting line on the veneer using the bottom edge as a straightedge. You can than cut the other veneers to match.
This isn't a high necessity for quarter cut wenge since there isn't high strong grain patterns. I will be using this a lot when I'm matching the figured maple.

Keep flipping back from flash and non flash on camera.


Moving veneers out and over lapping middle section on the right middle section 40mm in.

40mm section marked and ready to be cut.

Again checking on flash setting.

40 mm section cut off on middle inner right veneer. Joint section a light evenly spaced. This joint will run right down the middle of the diamond shape.

Now to work on the other sections still need to cut the far right veneer and the middle left veneer for the outer dark strips.

Cutting the 40mm section off for the outer right veneer section on the internal section.

placing back on flash setting to see joint. Section between the middle right veneer and outer right veneer is evenly spaced now between the dark brown stripes.

Now to work on the middle left section.

Marked out the 40mm section on the middle left veneer on the outer side.

Over lapped first to ensure joint looked good with grain figure.

Made cut. The 40mm offcuts are now match to the ends.


Double decking to see if veneers fit to the size of the panel. There is a light over hang but I'm ok with this since the over hang is in the off cut section. Although the veneer joints have not been cleaned. Once cleaned will need to make sure that veneer doesn't go past the 20mm offset in the reduced direction. If it does will need to add some more veneer to the edges.

Drew the white out line shape of the new placement of the top diamond panel again but darker.
Now this is where it can get confusing. Its going to be a lot easier to clean the joints when the pieces are in one length. Can fit it in one standard jig when running it over the jointer. Once the veneer joints are clean I can than cut the shape out than veneer tape it and press it to the ground work.
The large yellow triangle and the A1-A7 just shows the arrangement that they need to go back into. the arrows indicate the front.
Grain matching the drawer box lids

Like with the bases and getting the right veneer place on the right face the lids can easily be stuffed up if time is not taken into getting the correct placement.
The wenge veneer is going to be on the inside of the lid.

To make sure that I place the wenge on the right face I have named the inside section of the lids and place a W for the wenge and an arrow to indicate which face it is going on. Remember like with the drawer bases the long side is in the middle.

I want to try and match up the grain figure with the bases and internal sides as best as possible.

Its a bit hard with this shape since there are 2 central points so really where do you start the joint section of the veneer to ensure that its in the middle? Makers guess I choose top. I did this with the base so I decided to keep it the same.

Before jumping in and start cutting I selected the wenge veneers first that I wanted to use. I used the off cuts from the 2400mm cut veneer leafs. With the drawer bases and sides they had that dark brown stripe running through them, With the lids I wanted to continue this.
Used the top middle joint to line up with the selected veneer section to use. Again before doing this choose to veneer sections that I liked how the joint match up with the grain. Some of the lid substrate hangs over the veneer. This is ok since this is in the offset section.

Once I made one lid I was able to use the two parts as templates for the other side. I just flipped the veneer sections over 180 deg having the open face facing up.

Since dealing with the off cut sections to get the small veneer parts out of some sections were damaged which required repairing with veneer tape.

Cutting sections out with the pax veneer saw and using the large piece of timber as the straight edge.

Making sure its partner matched well with it. The top veneer part with the chalk on it is just being used as a template.

All lid veneers cut out and marked. This still need to have their joints cleaned before being veneer taped and pressed. Will be pressing these at tafe after I have pressed the wenge onto the drawer bases.

In the mean time placed veneer parts between two cauls and pressed with weight from bricks to avoid buckling.

As for the top veneer section did the same thing. These will be pressed when both the drawer bases and drawer lids are done.
Pressing up front drawer front wenge internal section.

This section is just a dry run to see how many clamps I was going to need and to also see if the clamping pressure was right.
In total I needed 12 F clamps.

I found this pressing diagram when using clamps helps out a lot on understanding the pressures and how it is disrupted evenly across a clamped substrate. This diagram was on the veneering and inlay book that I bought.

Before gluing up I need to attach some baking paper to both of the internal faces of the bottom and top caul.
To create a more cautioned press I cut some newspaper. 4 layers to be exact. If any moisture goes through the baking paper it will draw into the news paper.

Laid out the press layers before gluing up to make sure everything is in order. With polyurethane you only have about 15 minutes for the glue starts to cure so you have to work fast. Lucky the weather is a bit cooler so my working time is opened for longer. But still you need to be prepared before gluing starts.

taped down the baking paper so it doesn't slip from the cauls when being pressed.
Before gluing sanded and scored the glue face of the substrate and removed all the dust. This just oped the poors and would produce a better bonding. The Polyurethane needs moisture to react even though there is enough in the air i still wiped a damp sponge on the veneer glue face and substrate glue face.

Spread out the polyurethane very thinly. You don't need much as it expands.
Remembering needed to wear gloves and have doors open in work shop to create ventilation.

Taped painters tape on the veneer and substrate. This just prevents the veneer from slipping from the glue substrate when clamping. Made sure most of the tape was in the cut off offset sections.

Clamped the job up evenly spacing out the clamps to ensure that even clamp pressure was applied.

You can see that the glue is starting to cure. This was just 10 minutes in.

To clean the polyurethane off the scrapers I found using meth works well. Just apply to a rag and rub parts.

This was the internal veneer section for the drawer front that I pressed up. I decided to leave it in the press for about 24 hours since that is how long until the glue has reached it maximum bonding strength ( what is recommended on the bottle)
Like the test I did this sight of how much the glue has come through the veneer is a little bit miss leading. At first when I did the test that I thought this was going to take ages to clean up or I might not be able to clean it up ( might blow through the veneer into the substrate). My friend who is the fine furniture maker said just persist with it as it cleans up pretty easy. I sanded the test piece with 240 grit sand paper on the orbital sander than did 240 hand sanding along with 320 grit. The glue patches sounded out pretty quickly.

With this next glue up I decided to do two in the press. Doing one at a time was going to take too long. I don't have enough clamps and there is a lot of veneering to do.
I had to cut some more baking paper out and some more news paper for the pressing since I was introducing a middle caul. Since adding in another lamination job I had to work a lot faster so I had to be a lot more prepared to quickly place it in the clamps.

Sanding the glue faces with 240 grit sand paper and scoring it with the japanese hand saw on the rip blade.

Placed out all the painters tape I was going to need to secure the wenge veneer onto the substrate to prevent it from slipping when the cauls are pressed onto it with the F clamps. I found it annoying to try and pull it off the reel with the gloves. This will make things a lot faster.

Wiped a damp sponge over the substrate and the glue face of the wenge (opened face)

Applied the thin coat of polyurethane to the substrate.

Taped veneer down to substrate to prevent slipping.

Placed down layer of baking paper and 4 sheets of news paper than the middle caul and started the next glue up job.

Clamped up with the F clamps and will be leaving for 24 hours.

Glue has already started to being its curing process.
Taking drawer bases out of press and pressing up the next ones.

Took the two drawer bases that I glued up in the press. The polyurethane makes it look like its going to take ages to clean up or might not even clean up at all.
For the veneer tape and masking tape thats on the drawer bases or any of the veneer projects. Don't pull it off straight away. You need to add moisture to it to break down the adhesive bond. Ripping it when its dry will pull out the fibers from the veneer causing really bad damaged sections.

Here I am sanding and scoring the glue faces of the substrate to create a better bond.
Had to make sure that with these as well I was going to be gluing the veneers on the right face. Need to remember that the long side goes in the middle. There needs to be a left and a right and it has to go into the press between the cauls in a certain way.

Placed out strips of masking tape to hold down the veneer and prevent it slipping from the substrate when being pressed up. I placed out the strips so I could quickly get the job in the press. I only had a 15 minute work window to work in.

Before gluing up wiped the veneer opened face and the glue face of the substrate with a damp sponge.
The bottom drawer base is placed with the veneer facing up. The next one is placed with the veneer facing down. You need to do this since it is holding a left and a right. They need to be positioned like this so the proper clamping pressure is applied over all.
I think I may have applied too much glue last time on the others. So this time I decided to apply less glue. I just spread it out better and removed the excess.


Pressed up in the press at tafe.
Taking out drawer front 2 and 3 from clamps and pressing up drawer front 4 and long side 1

Took out drawer front 2 and 3 from the clamps in my work shop. I had these clamped up for 24 hours. Didn't have heaps of glue come up through it compared to the drawer bases that I clamped up at tafe so I think I'm getting the hang as to how much is the best to apply.

Preparing the next clamp up job. I was sanding and scoring the glue faces of the substrate that I was about to veneer over. I was veneering the last drawer front and one of the long drawer sides.

Ran a damp sponge over the glue face of the substrate and the open face of the veneer.

Applied glue with the scraper than placed the veneer onto the substrate. Clamped down with small pieces of painters masking tape to prevent veneer from slipping when being clamped up. After this placed down the baking paper and news paper layers. After this went onto the next glue up layer.
Taking drawer front 4 out and long drawer side 1+ pressing up long drawer sides 2, 3 and 4 and all the short drawer sides.
Clamped up the job with the same amount of F clamps and left for 24 hours to dry.

Took the last last wenge drawer front and also one of the wenge long drawer sides. Ready to have figured maple pressed to the other side.

Gluing wenge veneer to the next two long drawer sides that are the next press job.

Pressed up like the others and left for 4 hours to dry.

Took out of press after four hours and is now ready to have the figured maple pressed to the other side. Before any of the figured maple is pressed the backs need to have the masking tape cleaned off first.
I was getting ready for the next press job. This was the last wenge veneer section for the long side drawer sections. I only did one in the press since the shorter drawer sides shared different clamping cauls because they were about 40mm shorter in length. If I pressed one of the short sides with this the 40mm section would not obtain effective clamp pressure and the veneer near that section would be weak.
First I had to score and sand the substrate glue face to open up the poors.

Applied a damp sponge to the substrate glue face and the veneer opened face. This will help start the cure process and speed up the drying process. This will shorten the work time window to get it pressed.

Applied a thin layer of polyurethane to the glue face and scraped it all out with the tiny painters scraper.

Placed painters tape over the veneer to the substrate to avoid it from slipping when pressure is place on it when being clamped up.

For this I did not need the middle caul because I was only pressing up one of the long drawer sides.

I hadn't cut any news paper or baking paper to place on the cauls for the shorter drawer sides so I used one of the cauls as a template and cut out what I needed. I than taped the cut out baking paper sections to the caul faces that would come in contact with the veneer.

Scored and sanded the substrate glue faces of short drawer side 1 and 2.

Applied moisture to the substrate glue faces and the veneer opened face.

Applied polyurethane to substrate glue face and scraped out evenly with scraper.

Taped veneer down to substrate to prevent slipping.

Placed in cauls and ready to be pressed up.

Pressed up job and needed to leave for 4 hours to dry.
Cleaning veneer joints for drawer box lids and cabinet top.

While waiting for parts to dry decided to move onto the next job. I wanted to be able to quickly press up jobs the next day at tafe in the press so I decided to do most of the preparation in my work shop since I had the machines.
The wenge veneer sections for the drawer box lids had to have their joints cleaned. I used the same principal as I did with the drawer bases and sides on the jointer at tafe.

Like the drawer bases clean up was a lot easier since they were shorter parts and clamp pressure was a lot more evenly spaced out due to their being a shorter distance to cover with two clamps.

Veneer joints were cleaned and are now ready to be connected with the veneer tape.

Before taking the veneer parts out of the pressed pieces of timber you need to check whether there are still any chipped out sections on the joint edge. It usually takes a few passes.

Running the next lot over the jointer.

Some of the joint edges were poorly cut and needed to be trimmed before going onto the jointer to be cleaned. All this meant was using the veneer saw and straight edge again.

Placed veneer tape across the joint section but keeping it tight.

Drawer lid veneer sections connected together with veneer tape. Some of the veneers were damaged and need some repair. This was just adding veneer tape over the splits and bringing them back together.

Now started to run the cabinet lid veneer sections over the jointer to clean up the veneer joints.

All the joints for the veneer sections for the top have to be cleaned before they are connected together with the veneer tape. I stated earlier that it would be a lot easier to to clean the edges first than cut down the sections to the specific shape.
This took a little bit of extra effort. This is because I could not obtain effective clamp pressure in the middle since I did not have any clamps that had a deep enough neck depth to clamp the middle. This was mainly just for the wide veneer parts since they sticked out a bit. I think next time I will cut the parts down and use the smaller pieces of timber to clamp the veneer. This will mean I will only need to use two clamps and still obtain clamp pressure in the middle.
Or I could probably invest in some clamps that have a deep neck depth.

Once joints were cleaned I placed the substrate over the pieces to see whether I had gone past the 20mm veneer offset. I still had plenty to play with. The rest of the cutting/ prep I decided to do at tafe while waiting for other jobs to dry in the press.
Pressing up the last of the wenge short drawer box sides.

Scored and sanded the last of the glue faces for the wenge short drawer box sides.

Ran a damp sponge over the glue faces of both the substrate and veneer.

Applied polyurethane to the glue face of the substrate.

Applied painters tape to prevent veneer from slipping away from substrate when being clamped up with the F clamps.

Clamped up and will be left for 4 hours to dry.
Drawer box lids, bases and cabinet top at the press.

Took out the drawer box bases that I pressed up at tafe.

Scoring and sanding glue faces for the wenge sections of the drawer box lids.

Used a damp sponge to apply moisture to the substrate glue face and veneer open face. Now like with the drawer box bases there will be a left and a right. So one will have the veneer face facing up in between the cauls and the other will have the veneer face facing down.


Pressed up in press and needs to be left for over 4 hours. It was a cold day today so I decided to leave it in the press for about 5-6 hours. Since I added moisture to the job before applying the polyurethane it should speed up the curing process.

The veneer for the cabinet top was ready to be cut down into the specific offset shape. ( same shape as substrate)

Cutting the off cut sections off from the main sections.

Using the straight edge and veneer hand saw to cut off the off cuts.


Offcuts cut off and now ready to have veneer tape added to it.

Attaching the veneer tape to the veneer joints to keep it secure when being pressed.

I had a few issues with this which I would like to talk about. Some of the joints seemed a bit un neat with the grain structure. Like if you were too look closely you could spot out the veneer joint.
I don't think this would be totally noticeable since the cabinet is 1600mm high so it would be out of the average eye line. The average eye line is about 1500mm. The main issue with some thing like this is that you don't want it to be just past the eye line where you can look down at it when the light hits it.
Another reason also is that when wenge is oiled and waxed it becomes really dark so again hiding a lot of the grain structure.
Another point is that the top section is also getting marquetry. So some of the main sections that show the grain running off I can cut out and cover up with the marquetry.
There still needs to have the 20mm offset taken off so I guess I'll access this again and see what it looks like when it is cleaned up and the 20mm offset has been removed.
If this was a blonder veneer and wasn't having marquetry to it this would be a totally different story. More care will need to be taken in with the figured maple.
The top section was the best colored veneer that I wanted. I could not afford to take off heaps to try and completely hide th joints because the main brown stripes in the grain I wanted even spacing between them.

Veneer joints connect together. Some sections had to be repaired due to splits.


Preparing the cauls for the pressing. Placing butchers paper on the sections that will come in contact with glue.

Cutting out the shape of the substrate in the baking paper.

Out line made and ready to be cut out.

What I have to do now is making pyramid panels that are the same shape as the substrate but smaller in offset. The cauls and substrate are too big to be placed in the the regular press that I have been using for the other parts so I need to use the vacuum press.
The smaller panels are to be stacked up on one another from largest to smallest. When the air is being sucked out and pressure is being placed onto the pile of offset shapes it will press down on it and create pressure in the middle of the pressed job and than distribute the pressure outwards towards the ends of the veneer panel.
( I talk more about this in a earlier post)

I gathered scrap from the work shop and cut 3 panels. The panels were to be 50mm in offset to one another.

You tend to want to use material that is all the same thickness so I had to look in the scrap piles for a little while.

I worked off from the top caul and moved in by a 50mm offset. Once I got the measurements from that I transfered it to the next one ( next smallest on) and cut the shape out on the band saw. After that used this as the reference for the next one and moved in another 50mm offset.

The stack will look like this.

A lot of pressure is being placed on the cauls and these other pressure support panels especially on the corner and edge sections. To prevent damage to the vacuum seal rubber. I decided to run a 3/8s router profile right around the top edges.

Edges with 3/8 profile on them.

I also placed a 3/8 profile on the bottom and top caul. A 3/8 profile on the top edges of the top caul but a 3/8 on the inside of the bottom caul.

I also sanded down the corners a bit and sanded the band sawed edges to make them more smoother.

The vacuum press had not been used for a while so I decided to do a dry run first. Above this is what it will look like when placed into the press.

Placed into the vacuum press an d had air sucked out of it. It seemed to work really well very tight and applied good pressure. Although this sort of reminded me with the big press job I did a while ago. The maths may totally add up but some times you need to go out in faith and seem what happens. Seems like this could be an expensive exercise.

I was confident to move to the next stage. Since the air would be sucked out of the press I needed to make sure that there was moisture for the polyurethane to react. So in this circumstance it would be best to add moisture to the substrate glue face and veneer face.
Before I applied glue to this I sanded and scored the glue face.
I applied the polyurethane very thin to the substrate.

Placed veneer down and tape it down to the substrate to prevent it slipping from the substrate.

Bottom caul is placed down first than the actual job than a layer of baking paper. After this the top caul is added than the pressure distribution panels.

This is what it looked like before vacuum rubber is placed over.

The vacuum rubber is clamped down than the compressor is turned on and the air is sucked out of the job. While most of the air is sucked out the clamps are undone a bit for more of the vaccum rubber to suck down into the outside boarder trenching than clamped down again. This just gives more clamping pressure. Once happy the air seal is locked off and the compressor turned off and press power cord un plugged.
Usually jobs that go into the vacuum press have to be left in there a bit longer. Since there is hardly any air inside the press it curing process will take longer.
After about 30 minutes checked to see if the pressure had dropped ( encase of leaks) There was no drop in pressure which was good.

Took the first 2 drawer lid panels out of the press and got ready to press up the others.
Scored and sanded the glue faces of the panels.
Applied moisture to the glue faces and spread out the glue and than taped the veneers down onto the substrate than clamped up.

This is pretty much how much glue you need. The glue gets spread out to a very thin layer. You don't need that much since the polyurethane is a expanding glue.
Pressing up drawer box backs with wenge veneer

Needed to cut some bottom and top cauls for pressing the drawer box backs wenge faces to the substrate material. Cut them out from the left over MDF from cutting the larger cauls.

Placed names of the cauls not to get mistaken with other scrap in work shop.
Scored and sanded the substrate glue faces.

Before applying the polyurethane wiped down the glue faces with a damp sponge.

Masking tape added to prevent the veneer from slipping away from the substrate when being glued up.

Pressing wenge veneer to substrate.

Wenge veneer pressed to the four back substrates for the drawer boxes. Need to leave for 4 hours or more for drying.

Selecting veneer and jointing veneer edges for under neath face for cabinet top panel and top of carcass panel.
Needed to get a template size of the substrate material for the cabinet top. Needed to use this as a sizing reference for when cutting out the veneer for the bottom face of the top panel. The top substrate panel will be at tafe for the next week in the vacuum press.

The bottom face wont be seen at all. The reason why I am adding veneer to it is so the panel will be structurally stable. Veneer must always have odd layers so another layer had to be added.
The veneer underneath didn't need to be perfect in grain matching or colour. I decided to use scrap pieces from veneer leafs at tafe. This veneer is Fijian Mahongany.

Removing the damaged rough edges.

I wanted to use most of the small pieces first before I grabbed the wider pieces from the pile I took from tafe. You can obtain Fijian Mahogany in wider veneer leafs. The widest I have used is around the 320mm mark. Fijian Mahogany is pretty cheap.

Sections roughly cut. Will have the joints cleaned than will be cut to the specific shape of the substrate panel than veneered taped than pressed. Yellow chalk is used so when veneer parts are broken up when being machined they can be easily placed back together.
With the Fijian Mahongony compared to the wenge it is quite difficult to see what is the open faced or closed face. This is crown cut veneer. ( also known as back sawn). Usually you can tell what is the closed face or opened face due to the smoothness of each face, also to the way the veneer folds.
This is a combination of random matching and slip matching.

For now on I'm placing a lot of my veneer offcuts in containers to use for marquetry or other projects. Currently I am doing this for the wenge veneer and will be doing it for the figured maple as well.

Cleaning the seam lines for the veneer joints. Cleaning the edges on the jointer pressed between two pieces of timber and secured with clamps. This was for the smaller sections where the bottom picture was for the longer sections.


Placed template over selected veneers to make sure that I had not gone over the off set.

Once I was happy with the veneer section used chalk to mark the connection for the veneers and labeled each part.

What I had to do now was remove the off cut sections that were not needed any more. These off cut sections went straight into the container of veneer parts. ( into the designated container for the Fijian cedar.)

Veneer parts ready to be connected to one another with veneer tape.

adding small pieces across the veneer seam line keeping it tight. Than running a strip of veneer tape down the middle.

For easy transport to tafe the middle connection will be made there before it gets pressed. This is just to avoid getting it damaged.

Selecting the next batch of Fijian Mahongony to be placed on the top face of the carcass top panel. This face like the bottom face of the top panel doesn't get seen at all. Although it doesn't get seen veneer still needs to be added to it to keep the panel structurally sound. Plywood must always have odd layers.
This batch is a bit buckled and warped compared to the other stuff. I purposely grabbed some of the buckled veneer at tafe so I could do some testing on handling buckled veneers and how to get around it. This is because some of the figured maple is slightly buckled and I need practice on how to get around these problems.

I removed most of the damaged edges from the veneers but decided to try and get them flat before cleaning the joints on the jointer.

This is just a little twist and buckle but the other veneers were a lot worse than this.

The veneers were not that badly buckled so I decided to get them flat by applying water to it and heating it on a medium heat. I didn't need to size the veneer ( sizing is talked about in the article that I posted about half way on this post) I will go into more detail with this if I end up needing to do it for some of the veneers but it is most un likely I will need to. A lot of info that is in the article is not talked about but is talked about in the book I bought ( veneering and inlay) and will draw information from that and post onto blog if needing to go down that path with the veneering.
Since this veneer doesn't get seen it was going to be a perfect chance to experiment with getting veneers flat. When heating the veneers with the hot iron you want to turn off the steam function and set to medium heat. You don't want to dry the veneer too quickly as it will buckle up heaps and will roll also dry out and split. ( found this out while practicing)
You want to add water to the veneer and make it more workable before heating it with the iron. I used a spray bottle and set it to mist function. Using a spray bottle you can control how much water you add to the veneer. Start applying water to the top face ( face that doesn't want to roll out) It is best to use distilled water since some of the chemicals and properties in tape water or tank water can stain certain veneers ( that is why its best to do tests on scrap pieces first ) but since this panel face doesn't get seen it wasn't an issue.
When steam is added it can make this worse since the evaporating moisture can force impurities deep into the wood structure.
At first with using the hot iron you want to use light pressure and apply more pressure as you go and add more water to stubborn areas that need more work. You also want to remove the moisture from the back as well.
The veneer needs to be totally dry any moisture left in the veneer will encourage the veneer to revert back to its original shape. I found with this that you want to try and control the veneer and not wanting it to dry too quickly. I found that after a while when leaving the veneer it started to curl back up. I'm not too sure whether this was because moisture was still left in or I needed to place it under some controlled weight and let the drying process take its coarse.
I have read in some books it is also best to wet the veneer than put it in a press with news paper ( news paper will remove the moisture) and let veneer dry slowly. Some craftsman have specified to add water to the veneer before pressing it makes it flatten out more. Thought this would be a good idea since it would not interfere with the Polyurethane it would just speed up the curing process. They have also suggested to add moisture to the substrate glue face, which I have been doing any way.
When the information I have researched what ever method you use the moisture must be removed gradually. I guess each different process will be different to what ever veneer you use. Its getting the right process that fits the type of veneer that is the problem.
I have also read that the ironing process can be improved if glycerin or alcohol is added to the water. Although this can effect certain veneers and preventing it from taking on stains or bonding with the glue properly.

The veneers seemed to improve but some of them started to curl back up again. I found added weight to them helped to keep them flat.

Did a little bit of testing found this is what happens when adding water to the opened face.

Water added to the closed face didn't seem to curl up heaps like the top one. To remove most of the excess of water I used a sponge.

Decided to use this disposable cloth to help remove the moisture from the veneer and added weight to it.
This one was the most buckled one. I found that not all the sections can become flat 100 percent. I think its more done just to make the panel more workable. I wasn't going to get it flat like the quarter cut wenge. Found also that the veneer becomes a lot softer. This is because the wood fibers have been softened.
I think it will be best to press the veneer up quickly when getting it flat as I believe it will not stay in that shape for very long.
The main reason to add moisture to it and get it flat is because If I pressed it like it was before before trying to get it flat the veneers would split.
Now this isn't supplier fault with storing the veneers. Every veneer is different and each one will have different qualities from one another. There are all sorts of different grain directions and since being a natural product it will want to move even when it is not in a log form any more. I found that highly figured veneers tend to buckle more compared to quarter cut veneers due to the timbers grain structure from the cells.

A lot of further testing will need to be taken when working with the figured maple.
This is one of the main problems with veneer that I have decided not to try and veneer both outer and inner faces at the same time with my work. Each veneer is different and different steps need to be taken with it. Since I'm dealing with two different veneers on the same panel trying to press them both at the same time can be a little problematic at times.
Researched Facts and Tips. ( the following writing in red is the facts I gathered from the below website word for word)
http://www.joewoodworker.com/veneering/flattening.htm
Flattening Veneer ( I found this information on the above website and found it quite interesting and useful)
Even the highest grade veneers can have mild to moderate rippling. Crotch and stump veneer almost always arrive with a fair amount of rippling or bubbling. This is typically caused by areas where there is a high density of wood cells which expand and contract at a different rate than areas where the density of wood cells is less.
Veneers that have very slight "bubbling" can be glued to a panel without flattening. The key is to lightly mist the top side of the veneer with veneer softener after it has been placed on the freshly glued substrate. If you do spritz the veneer face, it's a good idea to mist the balance veneer as well (even if it is not bubbly).
The Quarter Trick
There's an old trick that I learned from a craftsman in Jarrettsville, Maryland for determining whether you need to flatten a veneer before you work with it in a vacuum press. You'll only need to do this trick once to learn when flattening is needed. After the first time, seeing and feeling the veneer will be enough to tell you if flattening is needed. Here's the trick.
Get a quarter ($.25) from between the cushions on your couch and place it on the veneer. Move it around the veneer and look for gaps between the veneer and the coin. If any place on the veneer shows more than 1/8" of gap under it, you'll need to flatten the veneer. Of course, this is just a rule of thumb. Some exceptionally brittle veneers will need to be flattened completely regardless of the gap.
Veneer Softeners 101
I've tried several types of softening solutions. Here's what I've found:
Fabric softener - I know there will be a large handful of readers who will say that they have used fabric softener to make veneer pliable. I won't argue this. Those folks are right. It will make veneer pliable but it will also leave a residue that can catastrophically affect the bonding of the material to the substrate.
Water - Indeed water will have a small and short-lived effect on a veneer's flexibility. It will not soften and condition the wood cells which is critical to getting the veneer flat without splitting. Additionally, if the water dries too fast, you can get splitting and cracking on the veneer sheet.
Homemade Softener - There's an age old recipe of consisting of 3 parts water, 2 parts yellow glue, 1 part vegetable glycerin, and 1 part denatured alcohol. This concoction will soften veneer but it's messy, hard to dry, and it will seal the wood cells which can have an effect on the wood's ability to accept a stain. Here's a tip. If you opt to use homemade veneer softener and find that it causes the veneer to stick to the absorbent paper, place a piece of fiberglass cloth between the veneer and the paper. Fiber glass cloth can be found at your local hardware store near the adhesives aisle.
Super Soft 2™ Veneer Softener - Despite its cheesy name, SS2 is by far, the most effective and user friendly veneer softener available. By temporarily plasticizing wood cells, veneers treated with Super-Soft 2 become easy to flatten and unbelievably flexible. It also does not affect the stain absorbing properties of the veneer.
Ultimately, it's the water in this product that makes the veneer soft and pliable. But there is another chemical in Super Soft which is extremely hygroscopic (it attracts moisture). This chemical remains in the veneer even after it feels dry. It is this remnant that keeps moisture in the veneer and allows the wood to remain soft for several days after the visible water content has evaporated. Check this out... if you get a drop of softener on your work bench and leave it there, the chemicals in SS2 will retain the water content and it won't evaporate for several days!
Application Instructions:
Apply by dipping, spraying, or brushing (spraying is ideal). I prefer to spray the veneer until it begins to drip. Be sure to saturate both sides of the veneer. Do not dilute the softener.
Allow the veneers to stand until the surface is free of shiny, wet areas. Ten minutes is plenty.
Place absorbent paper between each veneer and place the whole sandwich between two flat boards. Melamine boards work well for small to medium size veneers.
Apply plenty of weight to the top. With each extra pound of weight, you increase the success rate of the flattening process. I don't recommend flattening more than 4 veneers at a time. If the veneers are extremely brittle or wavy, only flatten 2 at a time.
Allow this to sit overnight.
Replace absorbent sheets every 6 hours until the veneer is completely dry. This can take several days. The number of paper changes depends on the thickness of the veneer and ambient temperature. Be aware that if you do not dry the veneer thoroughly, you increase the chance of warping and cracking the finished panel.
Determining when the softener has fully dried has a lot to do with your senses. If the veneer feels cool, looks dark, or smells a lot like the softener, then it is not quite dry.
The effects of the softener will last from 4 to 7 days. Be sure to apply your veneer within this time frame or you may have to flatten it again. If you are waiting more than a day or two before bonding the veneer, it's best to keep the veneer stored between to flat boards with some weight on top.
Which Veneer Are Easy to Flatten?
Based on my own experience... easy, fair, or tedious
Amboyna Burl - Fair
Ash Burl - Fair
Bubinga - Fair
Camphor Burl - Easy
Cherry - Easy
Chestnut Burl - Fair
Elm Burl - Fair
Etimoe - Easy
Koa - Fair
Karelian Birch Burl - Fair
Lacewood - Easy
Laurel Burl - Easy
Madrone Burl - Easy
Mahogany Crotch -Tedious
Maple Burl -Tedious
Birds Eye Maple - Fair
Curly Maple - Easy
Mappa Burl - Easy
Myrtle - Easy
Oak Burl - Fair
Olive Ash Burl -Tedious
Pimento Burl - Easy
Plane Tree Burl - Easy
Primavera - Easy
Redwood Burl - Easy
Rosewood - Fair
Sapele - Easy
Sen - Easy
Spanish Cedar - Fair
Tamo Ash - Easy
Domestic Walnut Burl - Easy
European Walnut Burl - Easy
Yew Burl -Tedious
Zebrawood - Easy
Vacuum Press Helps Flatten Stubborn Veneers
A quick tip from Joe
Apply softener to the sheets and place them in vacuum bag with a top and bottom platen. Place absorbent paper on both sides of the veneer(s). Vacuum the bag to at least 18" of Hg for an hour.
This will make the veneer flat enough to go into a lesser strength flattening device such as the method described above. Be sure to put paper towels between everything. From there, change the paper every 6 hours until the veneer is dry or use the "speed drying" trick below.
Super-Soft Speed Drying Trick
Based on an idea by Gene Young
After applying Super-Soft to the veneer, use a clothes iron set on medium heat to dry and flatten the veneer at the same time. Do this in a well-ventilated area. It's best to put a cotton or flannel cloth between the veneer and the iron. Keep the iron moving continuously around on the veneer. When the veneer appears to be dry you can prep it for the veneer press. The effects of the softener are notably shorter with this trick so be certain to use the veneer as soon as possible. Otherwise it may ripple again.
Most of what will be evaporated into the air at temperatures above 212F deg will be water. SuperSoft 2 has a very high boiling point, meaning no volatiles will be produced until over 350F degrees. Because it contains some water, it's possible that the steam from the water above 212F degrees will carry some of the softener with it. It's unlikely that the lower temperature will create any volatiles from the veneer softener, so it would be a small amount, if any. If some of the softener does get airborne in the steam, the chemical driven off is diethylene glycol monoethyl ether which, according to the MSDS, it is not expected to be an inhalation hazard. Both circulating and exhaust fans should always be used where volatiles are present.
Alternate Method for Stubborn Veneers
Apply the softener by dipping, spraying, or brushing and allow the veneer to settle between two flat boards and absorbent paper first. Place as much weight as possible on top. Wait 24 hours and then dry out the remaining softener with a clothes iron. This gives the best combination of flattening strength, speed, and durability.
Questions and Answers
Everything you wanted to know about Super Soft 2.
Will the softener affect the ability of the veneer to take a stain?
Unlike other softeners, SS2 will not affect the veneer's ability to accept a stain or dye. It does not contain PVA or other glue-like additives.
How do I know when the veneer softener has dried?
Determining when the softener has fully dried has a lot to do with your senses. If the veneer feels cool, looks dark, or smells a lot like the softener, then it is not quite dry.
Is the softener flammable?
No. Unlike our competitors, we offer it in a chemical format that is not flammable.
Does Super Soft 2 leave a glycerin residue when dry?
No.
What kind of incompatibility issues are there with this softener?
So far, we have yet to find any incompatibility issues with veneers treated with SS2. This includes water-based stains and finishes, oil-based stains and finishes, lacquer, conversion varnish, polyurethane, alcohol-based finishes, wood dyes, shellac, and others.
What is the shelf life of the softener?
The shelf life is indefinite. It should last forever.
How long will softening effect last?
The softening effects vary from one species to another. Some users are finding the flexibility remains for as long as 2 weeks. Generally speaking, you can expect the effects to last from 4 to 7 days.
Can you ship this stuff abroad?
Yes. We are the only company currently shipping this new formula to Canada, Alaska, and Hawaii.
Will Super-Soft 2 make the veneer sticky like homemade softener?
Not at all. The veneer will feel soft and pliable not sticky and rigid.
How much coverage will I get from a bottle of softener?
There's no way to specify a coverage amount. It really depends on the veneer species, grain, moisture content, and method of application. Most folks find that a quart goes much further than expected.
What happened to Super-Soft 1?
We no longer offer the original formula because it wasn't suitable for use with "clothes iron curing" and the effects were not as strong as the newer version.
How soft does it really make the veneer?
I shot the picture at the right to give you an idea as to how well Super-Soft 2 works. This image shows madrone burl veneer rolled around a pencil. There are no cracks or splits. If I can roll a burl veneer this tight, you can probably imagine the possibilities with complex veneering projects!

Once letting the veneers dry for a bit under pressure I decided to take them out and start cleaning the seam joints.

Even though all the moisture was taken out of this veneer it started to curl up heaps. It was pretty good for the first 30 mins but after that it started to curl up heaps.

Some of the curling will go down when re moving the offcuts.

Removing the offcuts with the veneer saw.

Off cuts removed but still heavily curved.

Flipped faces over have the curve going the other way.

connected veneer seams and fixed up splits with veneer tape.
I tried apply moisture to it with spray bottle and heating with hot iron but this totally back fired to the max and curled up heaps. I tried again by applying water to it and placing weight over it and let the drying process take longer.

I added the absorbent cloth to the bottom caul and on top of the veneer. When having weight on it it will draw the moisture out of it but wont stick to the veneer.

I was going to just add bricks to it but decided to clamp the whole thing down in between the cauls than add weight from the bricks in the middle.

I will leave this over night and un clamped and see how it is. If its ok I will need to press it up quickly which is good because I will be pressing it up that day at tafe. I will have to keep it under pressure before taking it to the press.

Cut out news paper which will cover the faces of the cauls that will come in contact with glue and cut out backing paper to protect the veneer.
I will need to cut some of the cauls off since it is a bit over size to fit into the hand veneer press. The veneer press is 590mm wide. The cauls for this job are about 605mm. I will not have to drop the offset will just have to cut off some of the corners of the cauls.
Before pressing up will need to add some moisture to it to get it flat again so the veneer wont split when being pressed.

Took the Fijian Mahogany veneer out of the press. Applying moisture to it than pressing it under the moisture absorbent cloths helped out heaps the entire whole panel is flat now. Although I don't reckon it will stay for this too long. So I decided to place it back in between the cloths and the cauls. It should be ok since I am pressing it up later today.
.JPG)
Had to cut the ends of on these cauls since they were a little too big to fit into the press at tafe.
.JPG)
Packing up the veneer press layers.

Before applying the glue needed to sand and score the glue faces of the substrate.

I had to work fast and wasn't able to take other photos. I applied water to the top part of the veneer and base but it started to curl up again. ( wont do this next time). Before applying the glue I sprayed water on the substrate glue face and rubbed down with a sponge. Once I had spread out the polyurethane glue I placed the veneer down and taped it to the substrate. This helped out heaps since it prevented the veneer from buckling up too much when I had added water to it.

Lucky the job just fits in the press both length and width.

Other end of the press.

Took the top out of the vacuum press that I pressed up earlier in the week. It pressed up really well no bumps or any thing.
Will be using this a lot for the bigger stuff in the final piece that doesn't fit in the other press.

I got some new cabinet scrapers a while ago but hadn't burnished the edge yet to make a burl on it. I currently have two 1mm thick cabinet scrapers, 1 .8mm, 1 .6mm and 1 .4mm.
The thicker cabinet scrapers need to have a bigger burl on the edge compared to the .6mm and .4mm. This is because they are doing bulker clean up and removal. This is usual for painter striping etc. I wont be using the 1mm or the .8mm on the veneer only the .6mm and the .4mm.
Since the veneer is only .6mm I dont want to use a very big cabinet scraper that has a big burl on it.
When burnishing the edge you use a tool that is called a burnisher. Normally you would sharpen the edges or file the edges if the scraper had some work before burnishing. Since these are just new I really only needed to use the burnisher to make a burl on it.
For making small burls on the edge you would have the burnisher placed at 90 deg. You want to lock the scraper in a bench vice. Run the burnisher over the edge back and forth with a firm tension. Keep checking the burl to see whether your happy with it. To make a bigger burled edge slightly tilt the burnisher at 10 deg when running across the top. This was really only done for the 1mm and .8mm scraper.

I wasn't doing a massive clean up for the top since I will be doing all the clean up in one go. Saves double handling. I only wanted to remove the veneer tape and painters tape so I could getter a better view of the grain structure since I needed to match the doors to it.

Lightly soaked the top with water from the spray bottle. Than rubbed the excess with a sponge. You don't want to soak the whole top just enough to loosen the adhesive with the veneer tape and painters tape. If your doing this remember to spray water on the bottom this will prevent bowing.

When removing veneer tape I usually let the water settle for a few minutes than I add some more water again wait another couple of minutes than start removing with the scraper. Usually after this time I can actually just peal most of it off by hand. You want to leave it for a while so the water has a chance to soak into the adhesive and break it down.

Instead of using the spray bottle to loosen up the smaller sections I just used a damp sponge. You want to be very careful with the painters tape not to pull off some of the veneer that is why it is so important to loosen it with moisture first. Even though most of it is in the 20mm offset section and it will be removed you still need to be careful when removing it as some of the tape does slightly go over the 20mm offset.

Top now has the veneer tape and painters tape removed. Again like I said I wasn't planning on doing a major clean just enough to get an indication as to what the grain looked like.

Even though there is moulding between the top and doors. I still wanted to roughly match up the grain of the dark brown streaks from the doors to the top.

The back doors need to match to the top where the the front door flaps needed to match more to the back doors. This is the right back door getting matched. Needed to carefully selected out the best veneer from my pack to use. I wanted to use this black streak a lot in my design so I needed t cut different sections out of certain leaves.

Had to remove a damaged section from one of the veneers. This will need to be replaced with a smaller veneer piece that is the same grain patter and colour. I could not just move it over since the alignment of the other big drown streak would not run in the same alignment as the other brown streak on the top.

This is the problem with this pack. At first with veneers I always though there was always a bad face. This is not the case. This face has lots of streaks running in a diagonal alignment across the grain. What this is kinks or bluntness in the veneer knife from the veneer mill. I'm assuming that they have not bothered to change or repair the blades because you usually don't do mirror matching with quarter cut wenge. Either that I bought a bad pack or the people the mill were just plain lazy. I have checked with my figured maple and both sides are totally clean. So I'm assuming its just not clean because its not a high requirement to mirror match the quarter cut wenge.

Matching up the next section of the right back door. It is a higher priority compared to the top to really hide the veneer seams in this since the doors are right at eye level. Even though it will be dark when finished and the marquetry will take a lot of attention away from it it still needs to be done. Some sections of the veneer seam were hard to hide due to the grain orientation between the two pieces. I will mark these sections out and try to cover with some of the marquetry.

Cutting down chosen piece to connect to the rest of the veneer pieces for the back right door.

Right door veneers chosen

Small section added into middle.

Chalk used to show indication of connection and placement. This is so It doesn't get mixed up with the other doors. Even though it is marked not everything is set in concrete yet since some things may be moved around the match up with the other doors better.

I was going to use the front face for the left door than I decided to see what it would be like if using the other side even though there were veneer saw marks.

Getting mirror stuff right you need to have your veneer leafs stacked up in the way the log was cut.
The top section here is the most important part of having the right colour and grain matching between the two doors. With the veneer saw marks you can sand them out on most woods. Its just the really hard woods you want to try and avoid this.

Matching the internal section of the left back door.

Getting the streak alignment right with the top and this door as well just like with the right door.

Although the more I looked now I started to question my self. The light score marks looked easy to sand out. I did a test and sanded them out and applied water of it to see it if they would show up ( water acts as a oil indication). They did not show up but the more closely I looked at the back of the veneer it looked like so sections of the veneer had been roughly torn out. Almost the same look if you placed masking tape over the veneer than tore it off. Grain sections looked like they had been torn out.
.jpg)

I decided not to use the other side now. With this job and the amount of work involved I did not want to risk it and find coming to the sanding and finishing stage I was going to have really big problems. Mirror matching wasn't going to be such a huge necessity with the wenge because of the darkness is becomes when finished and also the involvement of the marquetry.
I decided to redo this door. The parts already cut could still be used for the left front door flap. It's just some more veneer would need to be added since the door is wider.

Matching up the new pieces for the left back door.

Quite happy with this arrangement. As well it wont be highly noticeable as well since the doors are displayed on an angel. If they were running in a flat horizontal alignment that would be a different story.

Marked sections out with chalk

Now needed to match up the veneer parts for the front left door flap that would run in connection with the back left door.

The front door flaps will slightly be tapered outwards from the back ones since the back doors getting smaller than the fronts since they are recessed into the cabinet. So the black streaks are going to be hard to line up perfectly. In this arrangement I cant get a total 100 percent match up since the offsets have not be taken off, still need to add in the edging, the hinge gaps, etc. Right now its just about getting it to the best matching as possible.
When cutting off the offsets when transferring the image from the templates that will be cut out on the nesting CNC at work. I will need to make sure that the templates are being placed in the right alignment (in the middle of the door). This is so it doesn't muck up the alignment of the streaks.
Its most likely when finish is applied you wont really see these but its never too early to be careful. Plus if they do come out of alignment can slightly hide it with the marquetry.

Happy with the grain matching and colour matching with the front left door flap. Now to mark with chalk and move onto the next door.

Chalk added and also marked what door it was with coding.

Through out this job there was a lot of testing to see what was the best piece to use for the internal front veneer section for the front right door flap. This part has to connect well with the left front door in the grain alignment at the bottom and also with the grain alignment with the right back door.

Really had to keep walking back and looking at it from a distance. Lucky with using the flash it gives a good indication as to what it would look like. I don't have the best eye sight plus not the correct level of lighting in my work shop some times its too dark or too light.

Tried another piece but was not happy with this one either. The dark brown streak needs to slightly match up with the back door plus it needs to have a equal spacing from its self to the edge of the door just like the left door.

I was much more happier with this arrangement. The front doors brow streak are going to be slightly off.
What I might do is make some paper templates of the finished size of the doors and get the proper alignment than match the veneers with this. I might me making more work for my self since these may not even get seen but like I said never too early to be careful.

Choosing the next veneer connection. I was not happy with this one since the streak did not go right down to the bottom. So I decided on trying to find another piece.

Found the right piece and needed to find the next piece and get the right colour and grain so the veneer seam could be hidden.

Was happy with the doors now and have marked them all out.

Although before making the joints clean for connection. I will be making paper templates of the finished sizes of the doors and see how much the brown streaks will be out by. If they are out by heaps some further arrangement might need to be made with the veneers.

Back doors. The internal veneer section for the right door doesn't totally match up with the left with the dark brown streaks. This will not matter so much since I will be able to hide it with the marquetry.

Front door flaps. I am quite happy with this grain and colour matching.
No comments:
Post a Comment