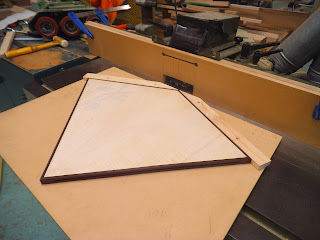
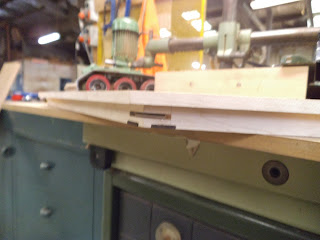
Machining miter splines into the top molding section, bottom cabinet base molding section, ikebana base, top drawer base and top carcass panel. They are not so much for structural since they don't really need it its more for aesthetic qualities.
I made all the miter spline cuts on the spindle molder using a 4mm saw blade. I wanted the splines to be 20mm in length on each side. ( the same as the doors and drawer box lids.)
The splines were also located in the middle of the panel.
To make these cuts required me making jigs to hold in the piece. I did not really need to use toggle clamps since it the cutter wasn't taking out huge amounts of waste and also there was plenty of total surface area for the parts to sit on so support wasn't an issue.
I just had to press down the corners a bit when making the cut since some of the panels were a bit bowed.
The jig parts were made the same as the door and drawer box lid ones. With these type of jigs you want to make them as simple as possible.
To insure that I was going to obtain the right cut I made the cut into the jig first. The inside exit cut on the jig would show me what the length of cut on each side for the part was going to be since the parts edges would be pushed flush up against the jigs fence.
These two set ups are just for the Ikebana base and top drawer base. I only had to machine miters in the sides and front.
Machining the miter splines in the top and bottom of cabinet. I had to make splines for the front, sides and back.
The spline cut had to sit just in the middle of the paduke strip. The paduke inlay housings were done on the saw which meant that they would be about 3.2mm.
I wasn't going to use paduke in these spline cavities I was going to use small strips of jarra as I wanted to create a feature with it.
Machining the miter splines in the sides.
For the ikebana base and top drawer base I was using thinner fence material for the jig. When coming to the top and cabinet base I had to machine some more fence material that was thicker since these parts were thicker than 16mm which is what the thickness was for the other parts.
I ended up using 32mm thick ash. This meant that I had to raise the hight for this set up. The depth of cute between the back, front and sides had to be different to be able to obtain the 20mm visual length on each side.
Machining the miter splines for the tops back.
Machining he miter splines for the bases back.
Machining the miter splines for the front section (front and side points) for the top carcass panel. I needed the saw blade to come out more so this required me removing my fake fence so I could get some more play. The fake fence was merely just there to act as safety not showing most of the blade.
The main reason why I needed to remove the fence was more so because of the edging that surrounded the top carcass panel. If I new earlier that I was going to use miter splines here I would have added the edging to the fronts later on. This spline edging idea was more a last minute thing.
But due to the edging this meant that The edges where the splines are would not be sitting up against a fence. I had to use blue painters tape to act as a breaker. ( prevent grain break out). Thats one of the main reasons also for the fences to prevent grain break out on the parts.
I only needed to do one jig set up for the sides.
Miter spline groove.
Cutting the small pieces of jarra to size to be glued into the miter spline grooves.
Removing some of the waste sections from the miter splines making it easier to clean later down the track.
Making the miter spline pieces ( paduke) for the ikebana base panel, top drawer base panel and the top carcass panel.
I glued the spline pieces in with tight bond 3.


No comments:
Post a Comment